In some situations you may find yourself working in a disconnected environment or working behind a firewall. ArcGIS Explorer can still be used in these situations but the services it connects to will not be available. This will affect the basemaps, find, directions and routing buttons, version checking and Help, as all of these items connect to Esri to give you the data you would normally see. With a few simple steps you can have your environment up and running without the adverse affects of not being able to connect to these services or functionality.
The following sections are organized as you would encounter them in a workflow of changing to a disconnected environment; as such you can read them in sequence. Use these links to navigate quickly to a particular section:
Get the ArcGIS Explorer Help
To use a local copy of the Help system, and make it available to others you will need to download and unzip the Help files on your local machine to a place you can serve it from locally, for example, C:\inetpub\wwwroot\Explorer. If you are using a copy of the help for yourself, you can download it and unzip the Help files to any location on your own machine, for example, C:\temp\ExplorerHelp\en. The Help, in all supported languages, can be downloaded from the ArcGIS Explorer download page.
Return to top
Create a new map
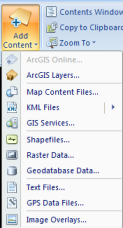
Start ArcGIS Explorer; if you have not used ArcGIS Explorer before and do not have Internet access, a wire frame globe will appear. Use the Add Content button on the Home tab to add a variety of data to create the map that you want to display with ArcGIS Explorer.
Save the nmf when it satisfies your users' needs. To save a document, click the ArcGIS Explorer Button  and click Save As > ArcGIS Explorer Map.
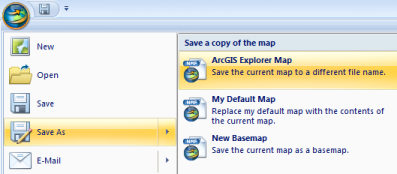
Browse to the location you want to save your map and give it an appropriate name.
Return to top
Save the current map as a basemap
Each of the basemaps within the basemap gallery in ArcGIS Explorer connects to an ArcGIS Online or a Bing™ service. Since you are behind a firewall or disconnected from the Internet you will not have access to these services. Using the map you created above, click the ArcGIS Explorer Button and click Save As > New Basemap.
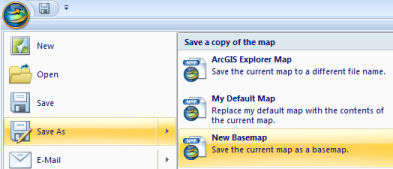
Give the basemap an appropriate name and click Save:

You can create a variety of basemaps using the Add Content button to add your own local data and repeating this process for each basemap needed.
Return to top
Create a new application configuration
Under Start > All Programs > ArcGIS Explorer click Application Configuration Manager to open the application configuration manager. This will allow you to modify the user interface to include your new map, Help, and to exclude the controls that try to hit Esri's servers.
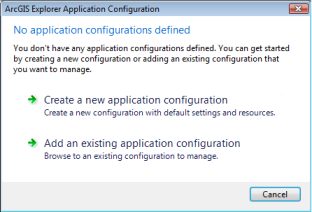
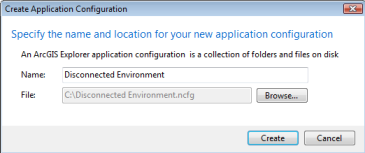
The first time you start the Application Configuration Manager, click Create a new application configuration to create an application configuration.
Give your application configuration a name and a file location.
Return to top
Modify the application configuration
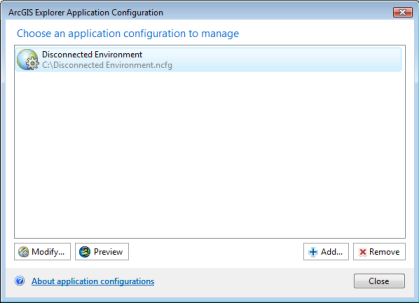
In the Application Configuration Manager, select the configuration you created and click Modify.
Return to top
Specify the new map and change the permissions
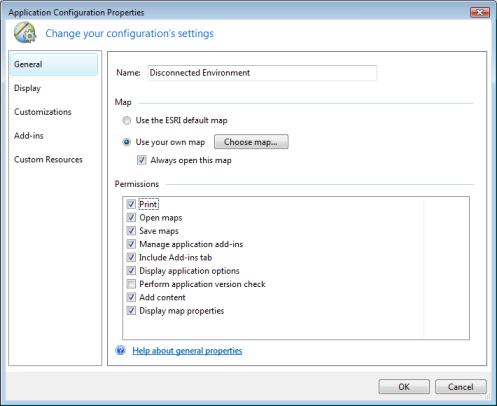
Under the General category, in the Map section, select the Use your own map option. Ensure that Always open this map is checked. Browse to the map you just created to select this as the map that will be seen every time ArcGIS Explorer is started and every time the user wants to create a new map.
Under the Permissions section, uncheck Perform application version check to prevent the application from checking to see if Esri has posted a newer version of the software.
Return to top
Specify custom resources
Change to local help
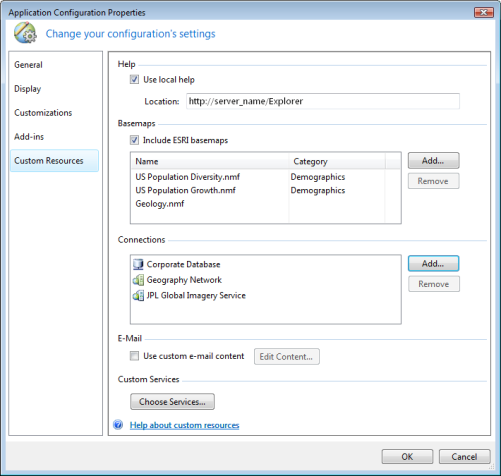
Under the Custom Resources category in the Help section, check Use local help and
change the location to the name of the local server that has the help system on it, for example: http://server_name/Explorer. If you are deploying the help to individual machines, you can do so by specifying a valid Uri; for example, if you've placed the help in C:\temp\ExplorerHelp, then specify this as file:///c:/temp/ExplorerHelp
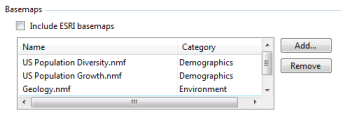
Change basemaps
In the Basemaps section, uncheck Include Esri Basemaps. Click the Add button. An Open dialog will appear, browse to the folder that contains the basemaps you just created. Select the basemap(s) that will be used. Click Open to add them to the Application Configuration Manager.
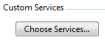
Change custom services
In the Custom Services section, click the Choose Services... button. The Choose Services dialog will appear.
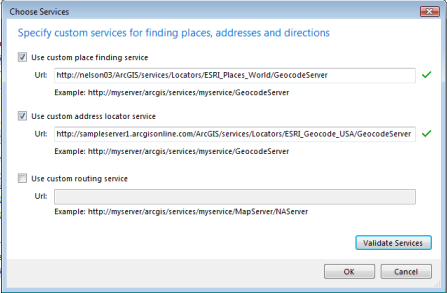
Check and type your custom place finding, address locator, and routing services into the appropriate text boxes. Click the Validate Services button. Once all services are validated with a green check mark on the right side, click OK.
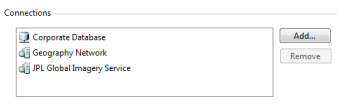
Change connections
Optionally, add geodatabase and server connections in the Connections section. To do this, start ArcGIS Explorer. Use Add Content on the Home tab to add all the servers and geodatabases that the application configuration will need. Note, this step only needs to be done on the machine that creates the application configuration. In the Application Configuration Manager, in the Custom Resources category, under the Connections section, click the Add... button. The Choose Connections dialog will appear, populated with all the connections you have added to ArcGIS Explorer. Select the connections you want to add and click OK.
Change e-mail
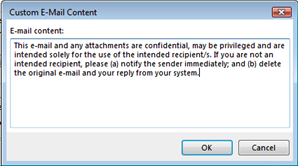
You may also wish to customize the e-mail content. This will affect the automatically generated message when a user chooses to e-mail content directly from the ArcGIS Explorer application. By default the ArcGIS Explorer Resource center link is included in this message. Under the E-Mail section of the Custom Resources category, check Use custom e-mail content. Click Edit Content....

The Custom E-Mail Content dialog will appear; use this dialog to type in the content of the body of the email as you would like it to read. When you've finished typing, click OK.
Redirect URL's for ArcGIS Online and Test Connection Speed
By default, Add Content > ArcGIS Online... and Test Connection Speed direct you to Esri. You can override the default URL's by:
- Create a xml file. The xml file should look similar to the following:
<?xml version="1.0" encoding="UTF-8" ?>

 <ArcGISOnlineURIList>

    <Base>http://www.arcgis.com/</Base>

    <Secure>https://www.arcgis.com/</Secure>

    <PingTest>http://www.esri.com/</PingTest>

    <SpeedTest>http://www.arcgis.com/arcgisexplorer500/support/downloadfile.zip</SpeedTest>

  </ArcGISOnlineURIList>
Save this file and place it in your Inetpub\wwwroot directory on your server.
- Set one of the following registry keys to point to your xml file:
HKEY_LOCAL_MACHINE\SOFTWARE\ESRI\ArcGIS Online\SignIn\HomeServerURIFile
or HKEY_CURRENT_USER\SOFTWARE\ESRI\ArcGIS Online\SignIn\HomeServerURIFile
(for example, HKEY_CURRENT_USER\SOFTWARE\ESRI\ArcGIS Online\SignIn\HomeServerURIFile = “http://www.myservername.com/redirect.xml”).
Only one registry key needs to be set. However, if both keys are set, the key located under HKEY_LOCAL_MACHINE
will take precedence.
Hardwire a computer to a specific portal
On start ArcGIS Explorer wants to get resources from ArcGIS online, things like the default map, basemaps and layer gallery items. System administrators can force ArcGIS Explorer to connect to a specific portal by creating and setting the following registry key:
HKEY_LOCAL_MACHINE\SOFTWARE\ESRI\ArcGIS Online\SignIn
for example, 32 bit machine [HKEY_LOCAL_MACHINE\SOFTWARE\ESRI\ArcGIS Online\SignIn]
or 64 bit machine [HKEY_LOCAL_MACHINE\SOFTWARE\Wow6432Node\ESRI\ArcGIS Online\SignIn
Add a String Value "HomeServerURIFile" and set the value to your portal ex. https://portaliwa.esri.com/arcgisuris.xml On start ArcGIS Explorer will connect to the portal instead of ArcGIS Online.
Return to top
Stop ArcGIS Explorer from phoning home
On start ArcGIS Explorer wants to get resources from ArcGIS online, things like the default map, basemaps and layer gallery items. System administrators can turn this functionality off by creating the following registry key in:
HKEY_LOCAL_MACHINE\SOFTWARE\ESRI\ArcGIS Connection\Settings
for example, 32 bit machine [HKEY_LOCAL_MACHINE\SOFTWARE\ESRI\ArcGIS Connection\Settings]
or 64 bit machine [HKEY_LOCAL_MACHINE\SOFTWARE\Wow6432Node\ESRI\ArcGIS Connection\Settings
Add a DWORD "Perform Check" and set the value to 0. This will stop ArcGIS Explorer from automatically requesting internet content on startup.
Return to top
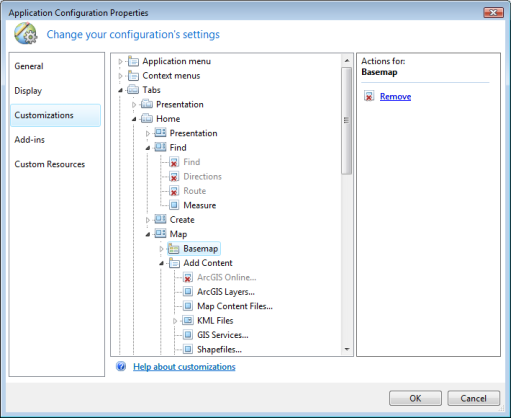
Customize the ribbon
As an optional step, under the Customizations category, expand Tabs, then expand the Home tab, expand the Add Content group and remove the ArcGIS Online... option. If you did not add your own custom services in the custom resources section, expand the Find group. Remove the Find, Direction and Route controls. You can replace each of these items by creating your own Add-ins with the ArcGIS Explorer SDK, to connect to your own sharing content and geocoding webservers.
Click OK to save your changes. Exit the Application Configuration Manager.
Return to top
Set ArcGIS Explorer's application configuration
In ArcGIS Explorer, click the ArcGIS Explorer application button, then click Set Application Configuration. Select Use the application configuration located at: Click the Browse... button to browse to the location where you saved the application configuration you just created.
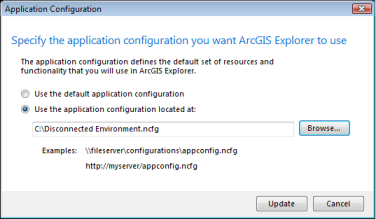
Click Update and restart the application.
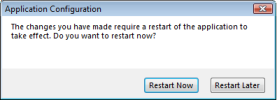
The application will restart with the changes that you have made.
Return to top
Changing the application configuration
Using the command line
You can create a batch file or instruct your users to set the application configuration automatically the first time ArcGIS Explorer opens by typing the following at the command prompt:
"<install location>\Explorer\bin\E3.exe" /AppConfig <application configuration>
For example, using the walkthrough above as an example, with ArcGIS Explorer installed in the default installation location, the command line to change the configuration would be:
C:\Program Files\Explorer\bin\e3.exe /AppConfig "C:\Disconnected Environment.ncfg"
Using a registry entry
You can specify the application configuration by setting the AppConfig registry value:
- Create the following registry key:
HKEY_LOCAL_MACHINE\SOFTWARE\ESRI\Explorerversion_number\Settings
(for example, 32 bit machine [HKEY_LOCAL_MACHINE\SOFTWARE\ESRI\Explorer1700\Settings]
or 64 bit machine [HKEY_LOCAL_MACHINE\SOFTWARE\Wow6432Node\ESRI\Explorer1700\Settings
)
- Create a new string value called AppConfig and set it to a URL which references the application configuration. Note that file system paths (including UNC paths) are not supported.
Return to top
 Feedback
 E-mail this topic
 Print this topic