Configuring a one-machine deployment


Configuring a one-machine deployment |
|
| Release 9.3 |


|
If your organization requires a small-scope deployment of ArcGIS Server, all the components can be installed on one machine. Installing all the components of ArcGIS Server on one machine is also useful for development or testing purposes.
The ArcGIS Server installation and postinstallation are designed to simplify deployment on one machine. For example, when you install on one machine, the server cache, jobs, and output directories are created automatically and given the appropriate permissions.
These are the steps you'll follow to get ArcGIS Server running on one machine:
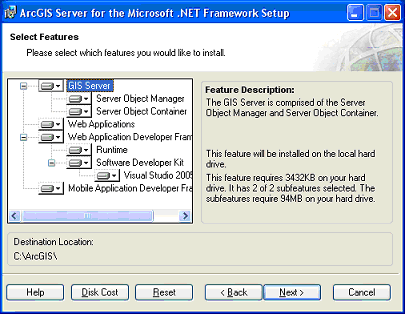
After installing any prerequisites as detailed in the System Requirements, you can begin installing the ArcGIS Server software on each machine in your system. As you navigate through the ArcGIS Server Setup wizard, you will see a panel that allows you to choose which components, or features, of ArcGIS Server to install. For a single machine deployment, choose to install all the components.
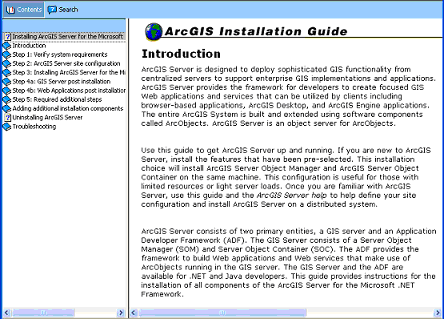
The ArcGIS Server Installation Guide contains detailed information about the software installation process. It also contains a list of system requirements and prerequisites for ArcGIS Server. You can open the guide by clicking the Install Guide button from the first panel of the ArcGIS Server Setup wizard.
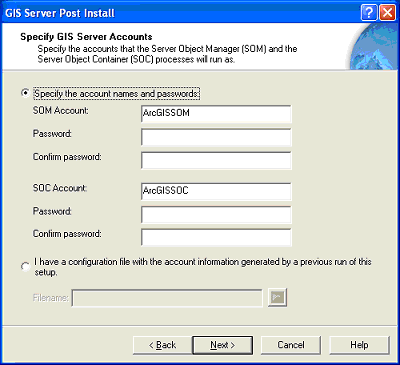
After you install the software, a postinstall wizard appears. This wizard will help you configure the necessary accounts, permissions, and directories for ArcGIS Server.
During the postinstall, you will be prompted to provide names and passwords for the accounts used by the GIS server, namely the SOM, SOC, and ArcGIS Web Services accounts. To understand what these accounts do, and best practices for configuring them, see Accounts used by the GIS server.
For security purposes, ESRI recommends that you make the SOM and SOC accounts local instead of specifying domain accounts. This ensures that a malicious user could not use the accounts to acquire administrative privileges on other machines in your network.
During the postinstall you'll also need to provide the name of the instance. The default name is ArcGIS. If you change the default, you should be aware that it will change many of the default examples of URL structure and paths to server files mentioned in the ArcGIS Server Help.
When prompted to enter the ArcGIS Web Services account, keep in mind the guidelines from Accounts used by the GIS server. You will rarely work with this account after running the postinstalls, and in most cases, it's sufficient to accept the default.
Note: There are two postinstalls: the GIS Server Post Install and the Web Applications Post Install. When you install ArcGIS Server on one machine, these postinstalls are combined into one the first time you run them. If you need to run the postinstalls again later, you can open each one individually from the Start menu.
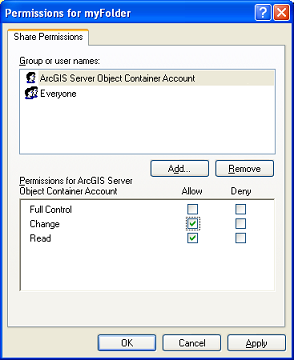
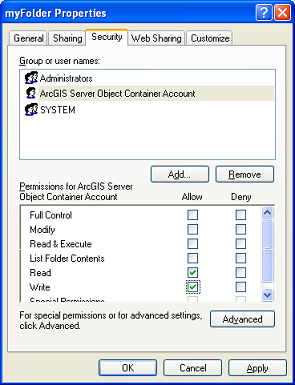
Note: In Windows Computer Management, the full names of the SOM and SOC accounts are the ArcGIS Server Object Manager Account and ArcGIS Server Object Container Account, respectively. When granting permissions to these accounts in Windows, the full name will appear.
You now need to specify which users will have administrative and regular-usage access to your server. The GIS Server Post Install creates two operating system groups: agsadmin and agsusers. The agsadmin group is for administrators, for example, those who will create services. You need to add yourself, and anyone else who will be administering the server, to the agsadmin group.
The agsusers group is for those who will be making local connections to the GIS server but do not need administrative access. You need to populate the agsusers group with a list of authorized users. Accounts already in the agsadmin group do not need to be added to agsusers.
You do not need to add the SOM and SOC accounts to the agsadmin and agsusers groups. These accounts are only used internally by the GIS server.
For the account settings created by the postinstalls to take effect, you need to log off and back on to the server before continuing.
If a folder contains data that will be used by a service, you need to do the following:
If the folder is shared, grant Change share permissions to the SOC account for the folder. When viewing the folder's Properties dialog box in Windows, click the Sharing tab and click the Permissions button to set these permissions.
Grant Read and Write file permissions to the SOC account for the folder. When viewing the folder's Properties dialog box in Windows, click the Security tab to set these permissions.
These steps apply not only to folders that contain the source documents but also to folders that contain data referenced within the document. Suppose you have a map document that displays two data layers. If the map document and the data reside in different directories, you should grant permissions as described in the steps above for both the folder containing the map document and the folder containing the data.
A simpler solution would be to store the map document and its data in the same folder. You could then use relative paths within the map document to reference the data. This way, you would only have to grant permissions for one folder.
If your data is accessed through ArcSDE, you need to make sure that your name and password are saved in the Database Connection. For detailed help with accessing ArcSDE data through ArcGIS Server, see the topic Preparing resources for publishing as services. This topic also explains what to do if your data is stored on a machine where no other components of ArcGIS Server are installed.
At this point you are ready to connect to the GIS server. You can use either Manager or ArcCatalog to connect to and administer the server. ArcCatalog does not have to be installed on the same machine as any of your other ArcGIS Server components; it just has to be on the same local network and not behind any firewalls.
If you are using Manager to administer your server, see Logging in to Manager.
If you are using ArcCatalog to administer your server, see Connecting to a GIS server for instructions on how to make an administrative connection.
With a connection to the server established, you can begin publishing your GIS resources as services. To add a service, follow the directions in Publishing a GIS resource to the server.
When you specify the GIS resource for the service (for example, a map document for a map service), you can use either a UNC path or a local path. If you use a local path in Manager, you will have to carefully type or paste in the path.
Once you add services to your GIS server, you can use them in Web or desktop applications. These can be Web Mapping Applications that you create with Manager or the developer tools included with ArcGIS Server. Or they can be ArcGIS applications, such as ArcGIS Explorer, ArcMap, or ArcGlobe. Mobile devices can also make use of properly configured services.