Tutorial: Publishing a KML service


Tutorial: Publishing a KML service |
|
| Release 9.3 |
|
You can serve KML dynamically over the Web by publishing an ArcMap document (.mxd) as an ArcGIS Server map service. The map service has a KML capability enabled, which allows a client to connect to the map service and request KML data for a specific geographic area. The KML can be exposed through a KML network link document that embeds a properly configured URL to the service.
This tutorial walks you through the process of creating a KML service with 3D extruded features. You'll first create the map in ArcMap, using ArcGlobe to set some of the 3D extrusion properties. Then, you'll publish the map as a service with the KML capability enabled. Finally, you'll create a KML network link on your server so that others can easily access the KML.
To publish feature classes with 3D attributes such as z-offsets or extrusion based on attributes, you must first edit the feature class layer properties in ArcGlobe and save them as a layer file, then add the layer file to an ArcMap document. For example, if you have a polygon feature class with a population density attribute, you can set the extrusion properties for that class in ArcGlobe, save the feature class as a layer file, then add the layer file to an ArcMap document (you can also configure extrusion and export a layer file in ArcScene if you do not have ArcGlobe available).
Start ArcGlobe and add a feature class.
Open the layer properties by right-clicking the layer name and choosing Properties.
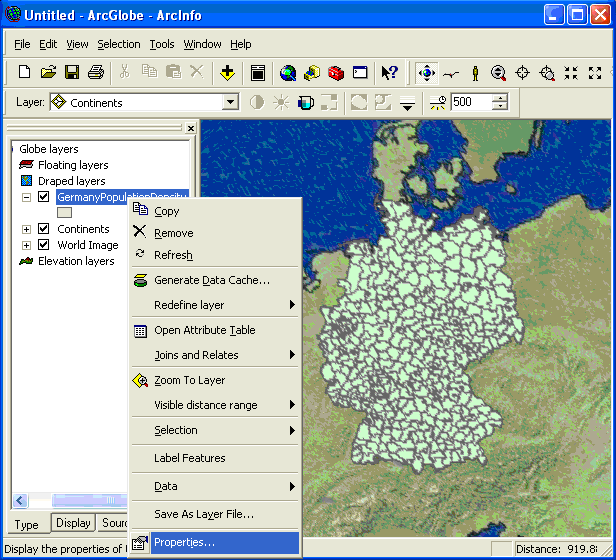
Click the Globe Extrusion tab on the Layer Properties dialog box.
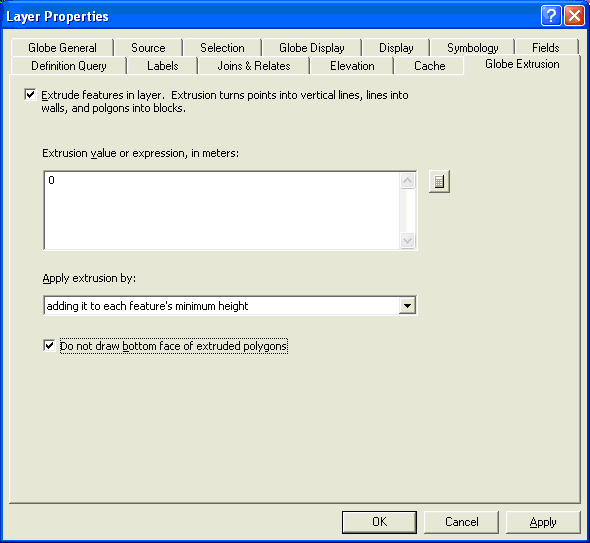
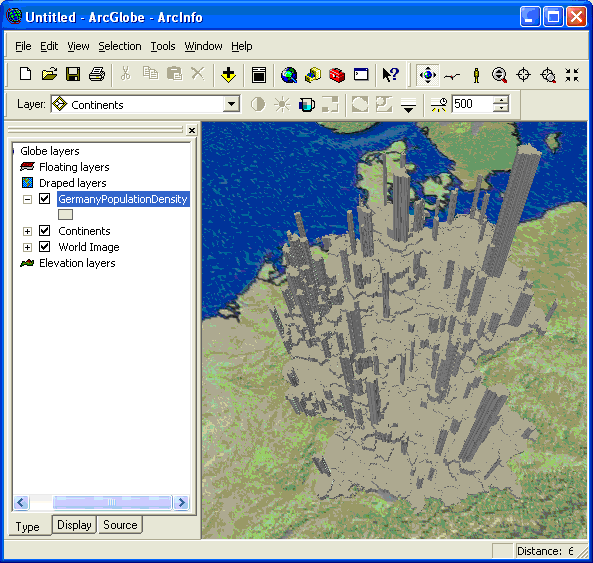
Select "Extrude features in layer" and "Do not draw bottom face of extruded polygons".
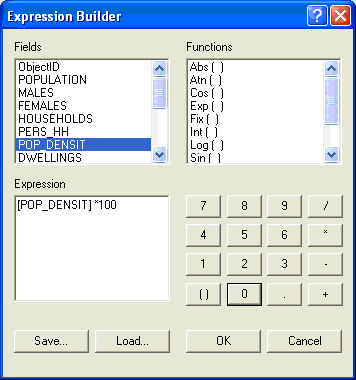
Set an Extrusion value or expression. In this case, the polygon features are extruded by multiplying the value of the POP_DENSITY attribute by 100 and adding this value to the feature base height.
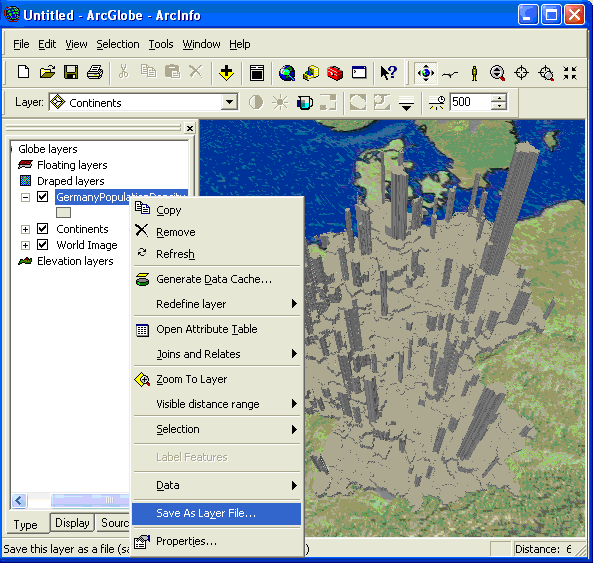
Now that the extrusion is set for the layer, right-click the layer and choose "Save As Layer File" from the context menu.
Now that 3D properties have been determined for the data, it's time to start ArcMap and set the 2D layer properties.
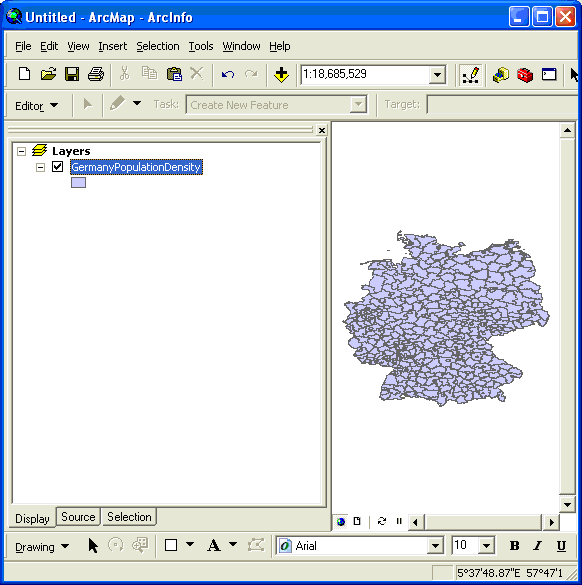
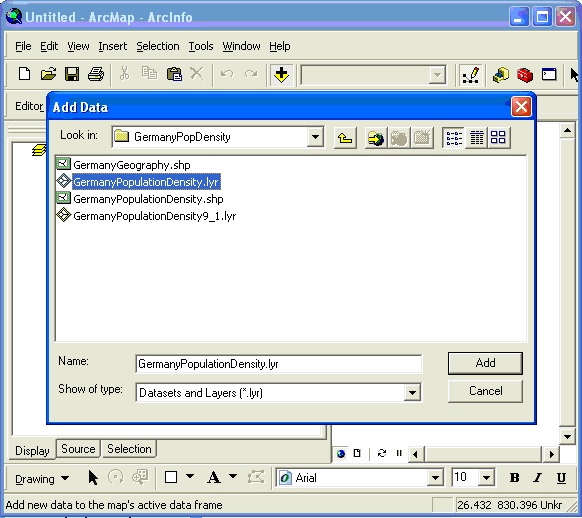
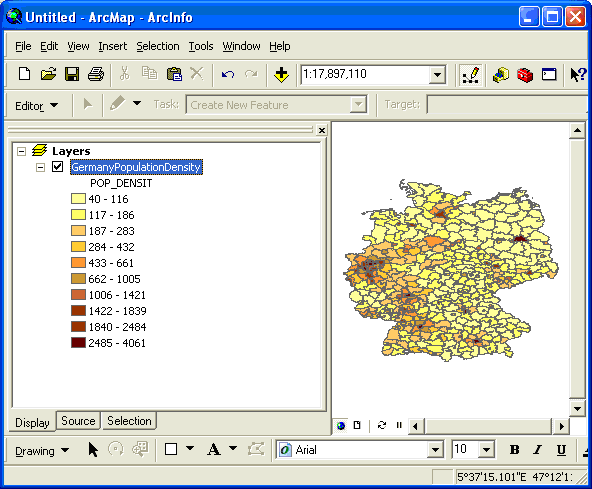
In ArcMap, add the layer just saved from ArcGlobe.
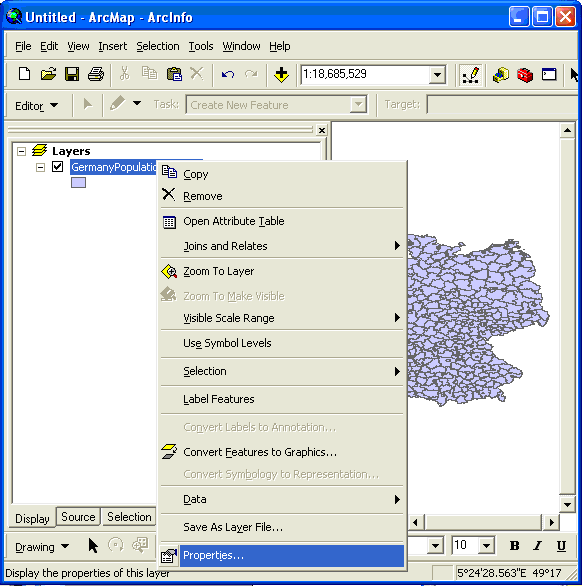
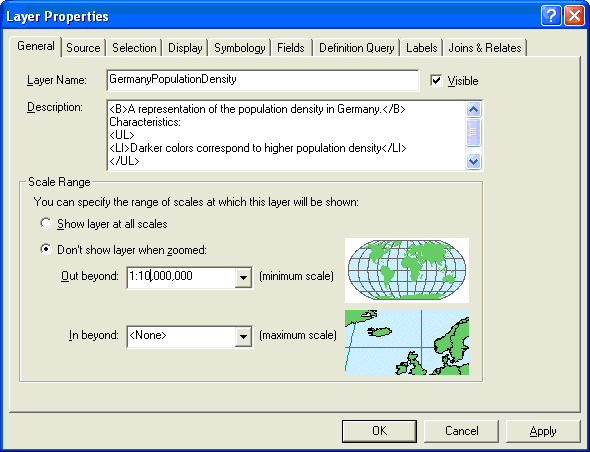
Set the 2D layer properties by right-clicking the layer and choosing Properties from the context menu.
Click the General tab, edit the scale dependency of the layer then enter a description. This description will be used for the KML layer description displayed in KML clients and can contain any valid HTML.
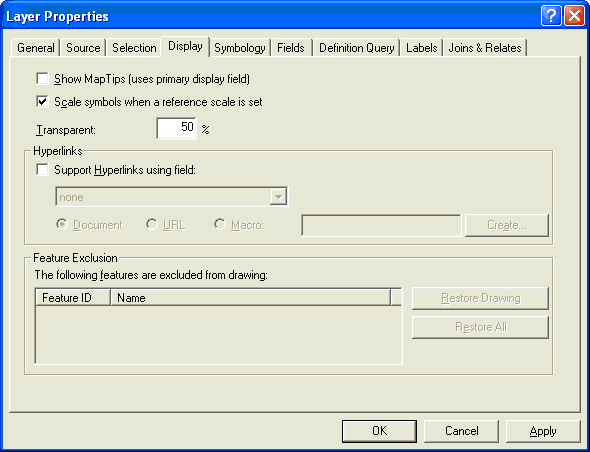
Click the Display tab and alter the transparency of the layer if you want.
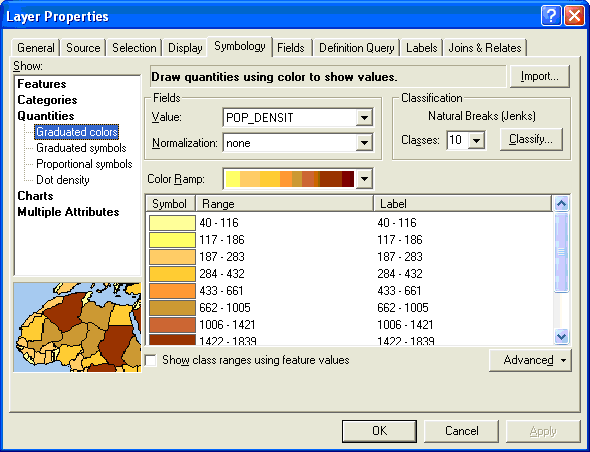
Click the Symbology tab and change the rendering properties.
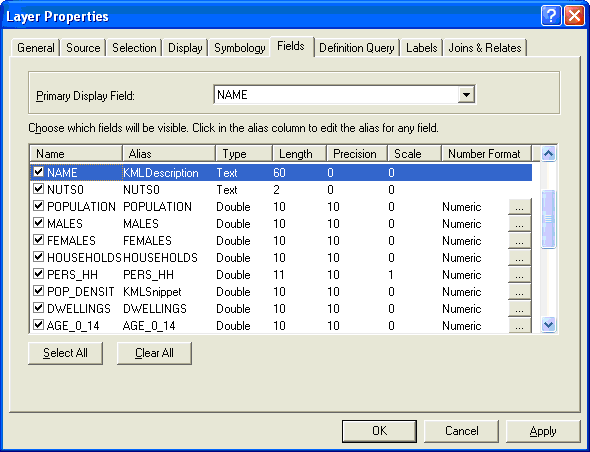
Click the Fields tab and alter the Primary Display Field if you want. This field value will be used to label the features in the table of contents. You can also use two reserved aliases, KMLDescription and KMLSnippet, in any two fields in the feature class. The values of the field that you change to use the KMLDescription alias will be displayed when a user clicks a feature in the table of contents of a KML client. The values of the KMLDescription alias field can contain any valid HTML. The values of the field that you change to use the KMLSnippet alias will be displayed below each feature's icon in the table of contents of a KML client. The values of the KMLSnippet alias field can also contain any valid HTML.
Once the 2D and 3D properties of an ArcMap document have been set, you need to follow only a few simple publishing steps to create a KML service. Follow the same procedure used to create an ArcGIS Server map service. By default, the KML capability is enabled on the map service. The steps below show how to do this in ArcCatalog. If you want to use Manager to create the service, follow the corresponding steps in Publishing a GIS resource to the server.
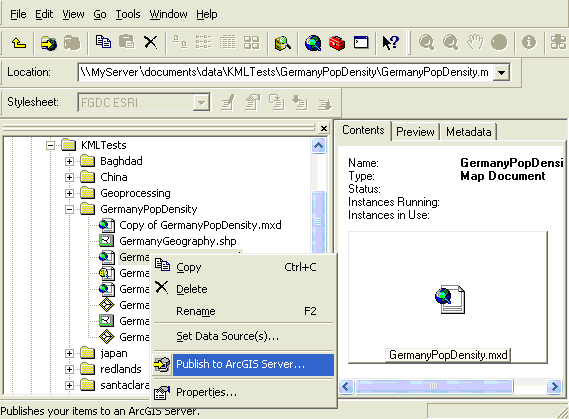
Using ArcCatalog, find the ArcMap Document you want to publish in the file system.
Right-click the ArcMap document (.mxd) and choose Publish to ArcGIS Server from the context menu.
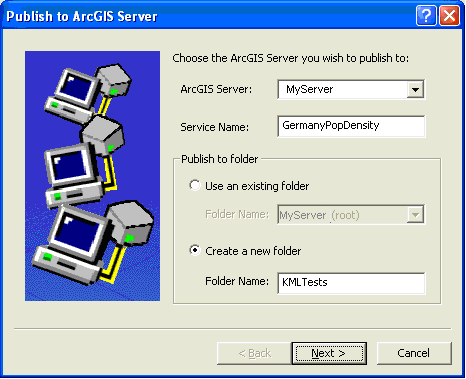
Choose an existing folder (or create a new one) in which to publish your KML-capable GIS service.
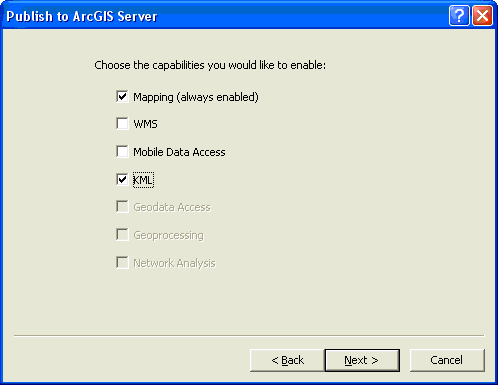
On the second Publish to ArcGIS Server wizard page, notice that the KML capability is enabled. Leave it checked and click Next.
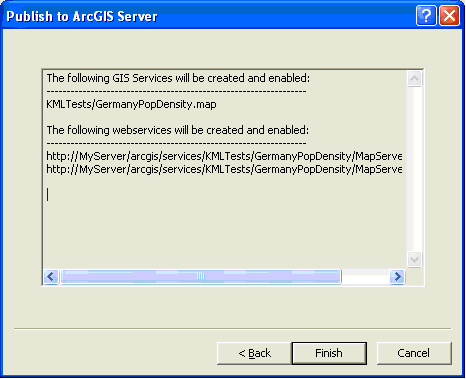
Review the summary of what will be created in the third Publish to ArcGIS Server wizard page and click Publish.
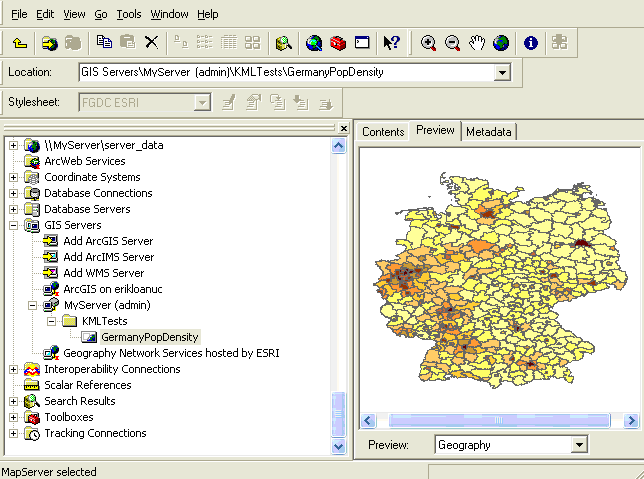
Your service has now been published and can be previewed in ArcCatalog by expanding the GIS Servers node and the folder in which you published your service, then choosing your service and clicking the Preview tab in the adjacent panel.
After publishing the KML service, you may want to edit its default properties. To do this, follow the steps below:
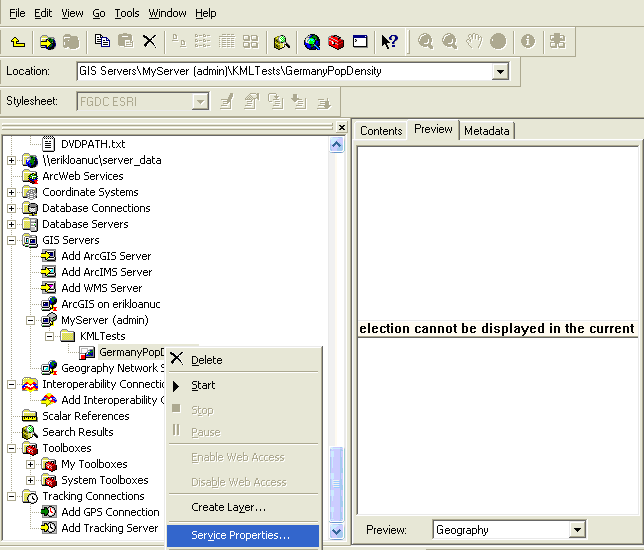
First stop the service in ArcCatalog by right-clicking the service name and choosing Stop from the context menu.
Next, right-click the service name and choose Service Properties from the context menu.
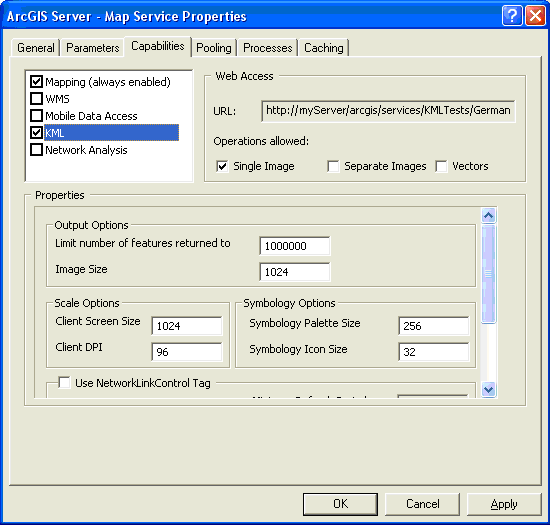
Click the Capabilities tab in the map service Properties dialog box.
Click KML (be careful not to uncheck the box) and edit the Properties in the lower panel.
Restart the service by right-clicking the service name and choosing Start from the context menu.
You can make the KML available on your server in an easily consumable format by publishing a KML network link. You'll publish the network link in Manager. Then you can add the network link in ArcGIS Explorer or Google Earth.