Tutorial: Creating a mobile editing project


Tutorial: Creating a mobile editing project |
|
| Release 9.3 |
|
With ArcGIS Server, you can create workflow driven Mobile applications focused on the collection and inspection of GIS data. You can create mobile projects using the ArcGIS Server Manager and deploy applications, projects and data to mobile devices to complete their field work. This example illustrates how to create an end-to-end field editing project focused on the inspection and collection of road signs in an urban area.
There are a number of steps that you will need to accomplish prior to creating your field project. They include:
Once you have completed these steps, you are ready to create your mobile editing project and use the ArcGIS Mobile application on your Windows Mobile device. The tutorial steps include:
The first step is to make the data that will be edited in the field available through an ArcSDE geodatabase. This example uses ArcSDE for SQL Server Express because it works with the free Microsoft SQL Server Express database and is available with the Workgroup level of ArcGIS Server.
Once you have your data available through ArcSDE, you need to create a map from the data and symbolize it appropriately. You'll publish this map document to ArcGIS Server so that it will be available to users of your mobile application. This document explains each part of the workflow.
Creating a mobile editing application requires that the data that will be updated in the field be stored inside an ArcSDE geodatabase. You can use your discression as to what transactional model you want to use for editing of data in the geodatabase (both versioned and non-versioned models are fully supported).
If you do not have ArcSDE already installed, an easy way to set up a small deployment is to use the ArcSDE included with ArcGIS Server Workgroup, which uses the Microsoft SQL Server Express database.
The first thing you need to do is install ArcSDE for SQL Server Express. The ArcSDE CD or DVD comes with ArcGIS Server and contains an Install Guide that can help you through the installation and post installation process.
Note: If you want to work through this tutorial and you already have ArcGIS Server Enterprise, you do not need to install SQL Server Express. The steps below are for the Workgroup level of ArcGIS Server and will not work with ArcGIS Server Enterprise. You can find information about administering Enterprise geodatabases in the ArcGIS Desktop Help book Administering ArcSDE geodatabases.
Once you've installed ArcSDE for SQL Server Express, follow these steps to create a geodatabase:
Double-click Add Database Server and type the SQL Server Express instance to which you want to connect. In most cases, this will take the form of <database server name>\sqlexpress. You'll see the server appear in the list.
Tip: If you have any difficulties connecting to the database server, see Troubleshooting connections to the database server.
Click the SOC account, give it read and write permissions, then click OK.
Tip: If you don't see the SOC account in the list, make sure you completed steps 3 - 4.
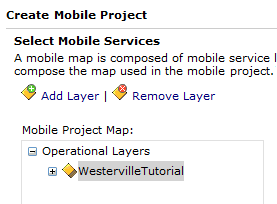
The map that you use in your mobile editing project can and will contain editable and non-editable layers. Follow these steps to create your mobile map:
The next step is to set the symbology for each layer. The tutorial data contains layer files for each of the layers that you have added to the map. To complete the tutorial steps, you will need to import the symbology from those layer files.
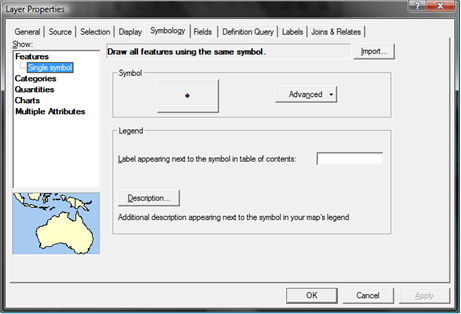
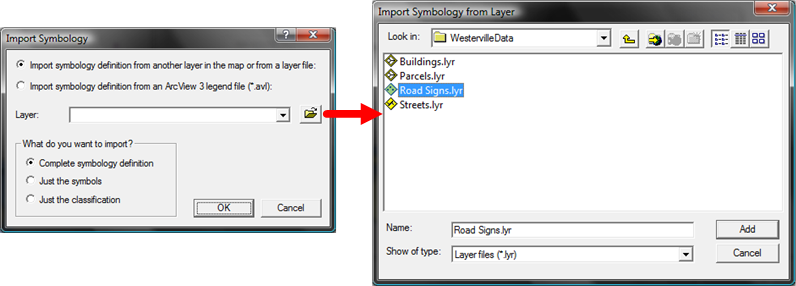
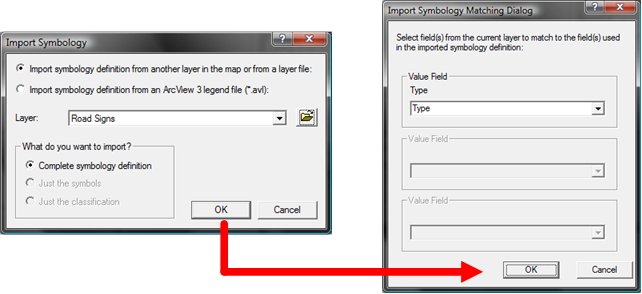
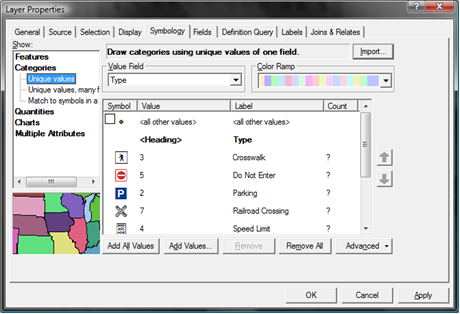
The Road Signs layer uses a unique value renderer to identify each of the feature types that can be collected in the ArcGIS Mobile application. The legend item for each value in the renderer is the name assigned to the feature type. Once you have successfully changed the symbology for the Road Signs layer, alter the symbology for the remaining layers following the above steps.
There are a number of factors to consider when authoring your mobile map. Consider the field workflows, which map layers are critical to the field worker, how environmental conditions impact visibility of the map in the field, and so on. For a more detailied discussion, please refer to the topic "Design and create mobile maps" located in the "Mobile GIS" book contained within the ArcGIS Desktop help system.
Once your map document is complete, you can publish it as a map service. When you publish a map service, you make it available on your ArcGIS Server so that many users can access it at once.
You can use either pooled or non-pooled map services when designing for mobile editing applications. Mobile applications are stateless. Each post of edits to the server starts a new edit session, stores updates inside of that edit session and then closes the session. If, however, you would also like to leverage the same map service to support web editing applications you need to carefully consider whether or not to publish a pooled or non-pooled service. Refer to the Creating a Web editing application" tutorial for more information on this topic.
Before publishing your services, be sure to read and follow the guidelines presented in Preparing resources for publishing as services. These will help you ensure that the server has permissions to read and access all of the data for your map. Specifically, the SOC account needs to have read permissions to your map document and any data in the map document. It also needs to have write permissions to any data that you will be editing. If you have the components of ArcGIS Server distributed among multiple machines, all of the above data must be referenced using UNC paths or ArcSDE connections so that all machines can read it.
Follow these steps to publish a map service that you can use with the ArcGIS Mobile application:
Log in to ArcGIS Server Manager and click Publish a map, globe, or other GIS resource as a service.
Tip: There are two wizards in Manager that you can use to publish services. This link takes you to the Publish GIS Resource wizard, which is the simplest way to create a service. It asks you the minimum amount of information needed to create a service.
The other way to create services is the Add New Service wizard. This wizard is the completely manual way of publishing a service; it prompts you for all of the service parameters.
Now that you have created your field geodatabase and authored and published your mobile map service it is time to focus on the ArcGIS Mobile client application and the tutorial mobile project that you will create and deploy to your mobile device.
The ArcGIS Mobile application is contained within a .CAB file called ArcGISMobile.CAB and is located on the web server that you installed ArcGIS Server Manager application onto (\Inetpub\wwwroot\ArcGIS\Mobile\Software). A .CAB file is an installation file for your Windows Mobile device. There are a number of ways to get the .CAB file onto your device and install the application. The method used in this tutorial is for you to pull the .CAB file to the device using the web browser on the device itself.
To install the application, open Internet Explorer on your Windows Mobile device and navigate to http://<web_server>/arcgis/mobile.
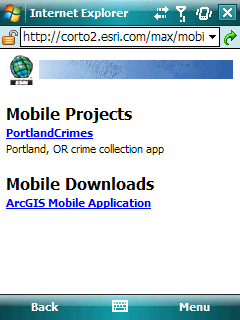
On the web page, click the link titled Click to download the ArcGIS Mobile Application and start the installation on your device.
Note: You must first have established a network connection on your Windows Mobile device to the location of your web server. Please follow the device instructions for establishing a desktop passthrough connection using ActiveSync for Windows XP or Windows Mobile Device Center for Windows Vista. Your Windows Mobile device must also meet the system requirements for ArcGIS Server - it must be running Windows Mobile 5 Pocket PC Edition or Windows Mobile 6 Professional and already contain the update for CompactFramework 2.0 SP2.
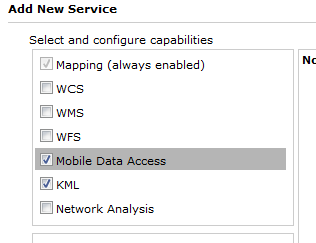
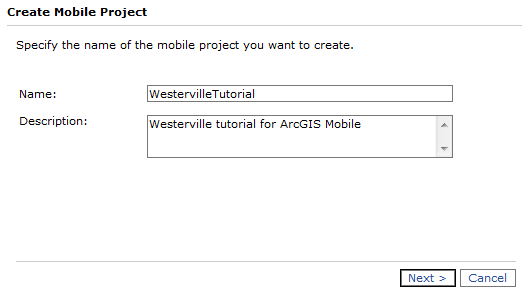
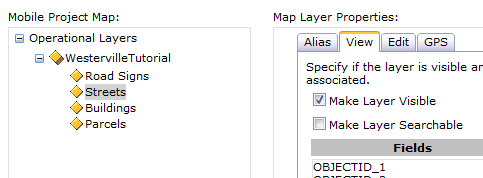
Once you have a running map service with mobile data access capabilities, you can now create your mobile editing application. You'll do this using Manager's wizard interface for creating a mobile project. The wizard will guide you through the process of defining a new mobile project. The project identifies mobile map resources and the tasks that will be used in the ArcGIS Mobile application. One of the most important steps in this process is identifying the mobile map service and configuring the properties of each map layer in the service.
These are the steps for creating the mobile project:
The final step is to establish what tasks are to be used in the project. You can rename each task and provide a brief description. The tasks chosen will appear on the tasks page in the field project. Each task should contain a name and description that best suits both the task that needs to be accomplished in the field and the verbage used by the field worker.

So far you have created a new multi-user geodatabase data model, authored a new map document designed for a mobile device, published that map as a map service with mobile data access capabilities, deployed and installed the ArcGIS Mobile application on your Windows Mobile device and designed a new mobile project for the ArcGIS Mobile application. The final steps of the tutorial involve using the ArcGIS Mobile application to:
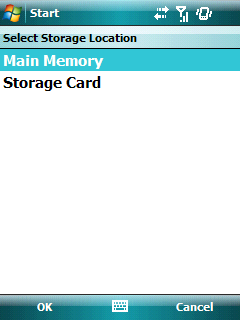
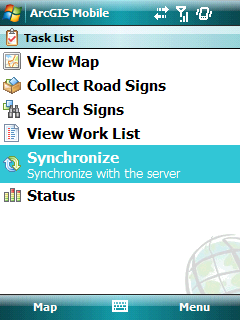
Before you start, you need to open the ArcGIS Mobile application on your Windows Mobile device. From the Start menu, click Programs. In the programs list you will find ArcGIS Mobile. Click on ArcGIS Mobile to start the application.

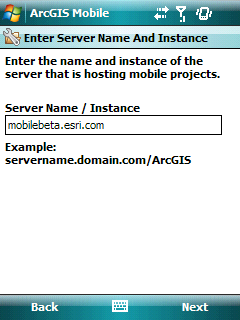
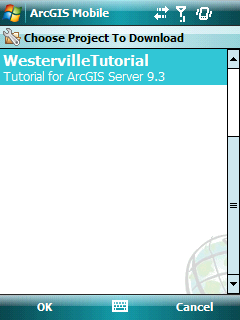
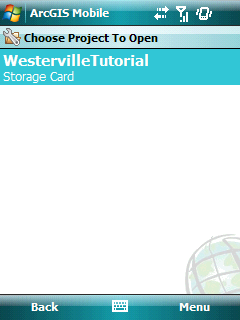
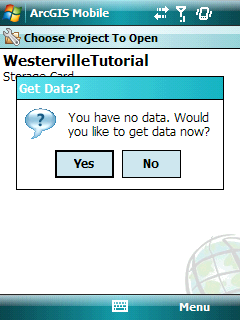
Now that you have downloaded and clicked the WestervilleTutorial project from the Choose Project page, you will be guided through the process of synchronizing data from the web server to your device.
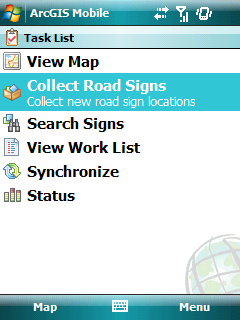
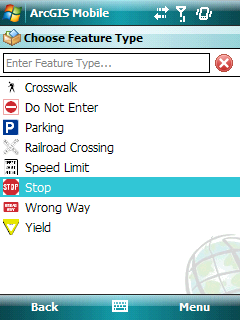
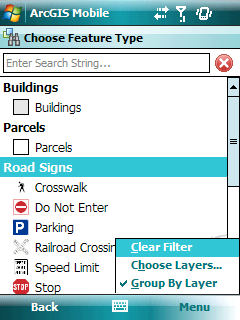
After receiving data from the server using the Synchronize task, you are ready to collect new road sign locations using the Collect Features task. GIS feature collection using the ArcGIS Mobile application is accomplished using the Collect Features task and you will collect new signs within the Road Signs layer. The task itself will drive you through the collection process by first requiring you to choose a type of feature to collect, then prompting you to sketch or capture the location of the new feature and finally to assign attribute information to it. During the process of defining the mobile project, you should have renamed the Collect Features task to Collect Road Signs. When authoring the map, you set a unique value renderer for the Road Signs layer. Each value in the renderer is a feature type in the Collect Features task.
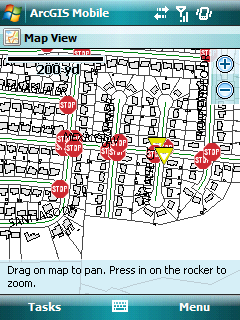
Once you have chosen a feature type, the map page will appear so that you can locate the shape of the new stop sign. By default, the map page is in a mode where you can simply tap on the map with your stylus to create the location of the Stop sign. However, the map may not be centered at the proper location or it may be zoomed in too close or out too far. If you are at the right scale, you can simply use the directional pad on the rocker to move the cursor. When the cursor reaches the edge of the map display, it will automatically pan in that direction. Also, you can zoom in or zoom out on the map by pressing the right soft key menu and pressing Zoom In command or the Zoom Out command.
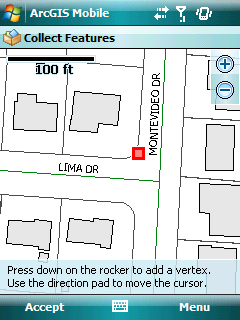
The method that you just used to set the location of the stop sign is "Collect Using Stylus". You can change the collection method from the Collect menu. Other options include Collect Using GPS and Collect Using XY Coordinate. Also, you can offset the location that you set by pressing the Menu soft key and clicking the Offset Location command from the menu.
The final step of the collection process is to set attributes for the new feature. Fields that contain business rules (domains) present a drop-down list of valid values for you to choose from. Date fields provide a date picker to choose the correct date from.
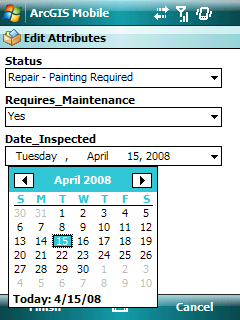
When you are done setting attribute values, press the Finish soft key to complete the collection workflow. This will return you to the Choose Feature Type page so that you can collect a second feature. To return to the Task menu, press the Back soft key.
Using the ArcGIS Mobile application you can create new features using your stylus or a GPS receiver or by entering XY coordinates with the Collect Features task. You can also update the attributes of existing features. In order to update existing features, you must first search for them using the Search Features task.
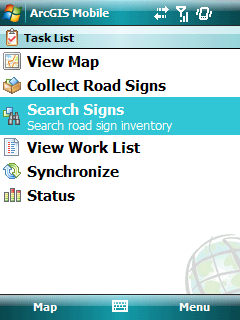
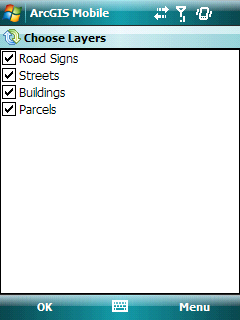
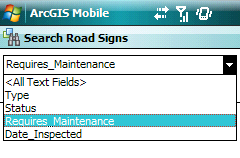
The Search task guides you through the process of searching for features - just like the Collect Features task does. You can search for features in a feature type or you can search against all features in a layer. The layers that you can search against were set when you defined the project by checking or unchecking whether or not the layer was searchable.
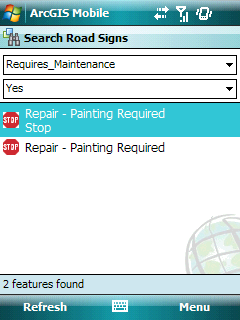
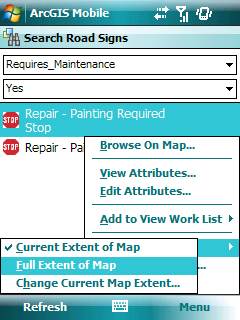
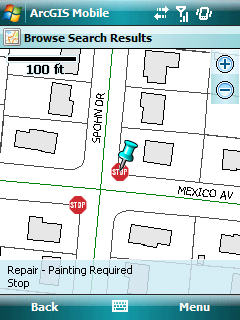
You can browse each feature by pressing the up or down arrow on the directional pad of the rocker. The information bar displays the feature type and the value of the primary display field of the feature. As you move between features, the map will pan to include the browsed feature on the display. Point features (like road signs) will be highlighted using a pin.
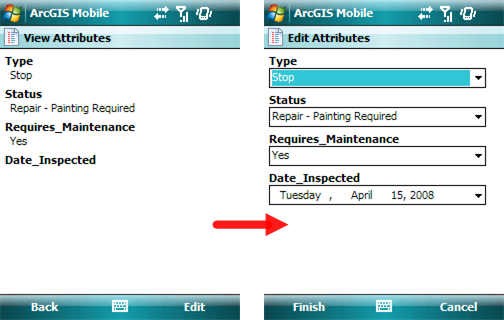
Here you can change one or more attribute values and then press the Finish soft key to complete your attribute update.
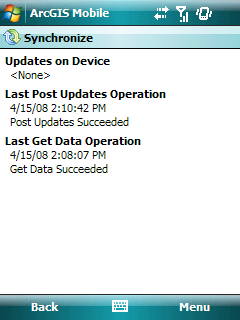
In the previous two sections of this tutorial, you created a new feature and updated an existing feature. With updates complete, you can synchronize your changes back to the server. Using the ArcGIS Mobile application, you are in complete control of the synchronization process.
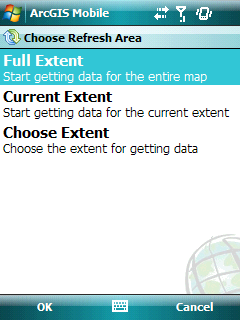
The first section of the page displays the current status of the features that are on your device. If you collected one feature and updated one feature, then this will be recorded by the status on this page. If you would like to see more detail regarding the updates on the device, you can click View Updates... from the Menu soft key. From the updates list, you can choose to Cancel Edits for a selected feature.