Tutorial: Publishing a network analysis service


Tutorial: Publishing a network analysis service |
|
| Release 9.3 |
|
ArcGIS Server supports performing network analysis on transportation networks. This includes finding the best route, finding the closest facilities to an incident, or generating service areas for one or more facilities. To learn more about the different types of network analysis and their capabilities, see Types of network analyses in the ArcGIS Desktop Help.
There are several ways to perform network analysis using ArcGIS Server:
For more detailed information about accessing network analysis functionality in ArcGIS Server, including additional capabilities not supported through the network analysis service, see Network Analyst Library Overview - Server Objects on the ESRI Developer Network (EDN) Web site.
This tutorial walks you through the process of creating a map document capable of being used for network analysis and publishing it as a map service with the network analysis capability enabled. It then lists several developer samples that can consume the network analysis service.
A network analysis service requires a map service that contains one or more network analysis layers. This means the map document published to ArcGIS Server must contain one or more layers that are network analysis layers created with the Network Analyst toolbar. Currently the network analysis service supports the route, closest facility, and service area analysis layers.
Follow these steps to create a single map document capable of performing all three of these types of network analysis:
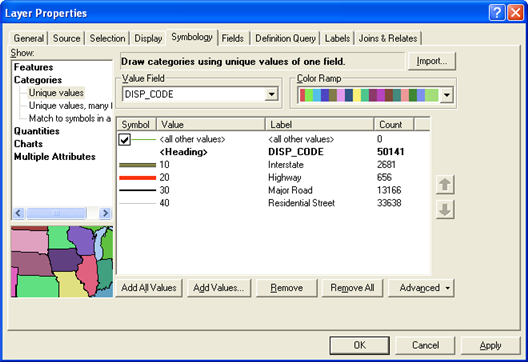
In the table of contents, uncheck the Streets_ND_Junctions layer since most users do not care to see them. Uncheck the network layer referencing the network dataset. This is because it is faster and you have more flexibility drawing the streets using the streets feature layer. Symbolize the streets using a unique value renderer based on the field DISP_CODE.
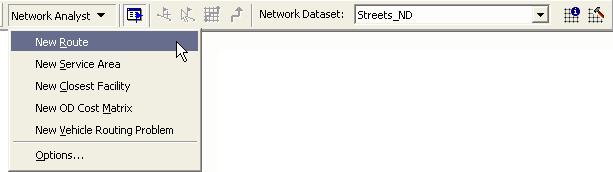
Add network analysis layers to your map using the buttons on the Network Analyst menu on the Network Analyst toolbar. Click New Service Area, New Closest Facility, or New Route to add a service area, closest facility, or route analysis layer to the map.
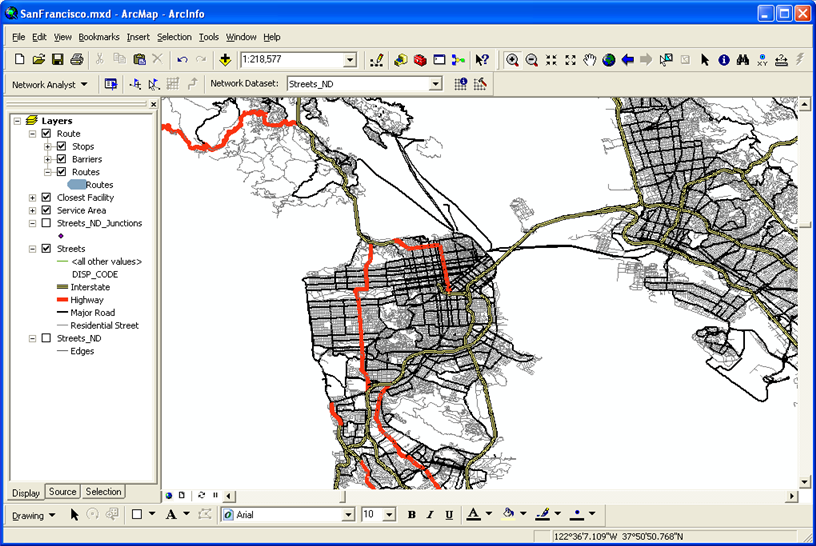
Change the symbology of the network analysis sublayers if you want different symbology. For example, you may want to make the Routes feature layer to be 50 percent transparent and have lines that are 10 pixels wide.
Click File > Save to save the map document to disk.
The name and location of the map document can be anything. However, if you would like all the developer samples to work with this service without any modification, you should save it to the location of the sample map document that comes with the software developmer kit. To do this, follow these steps:
Once you have a map document with a network analysis layer, you're ready to publish it as a network service. You'll publish the map document as a service and enable the network analysis capability, which will create a network analysis service of the same name.
Important: Before publishing your services, be sure to read and follow the guidelines presented in Preparing resources for publishing as services. These will help you ensure that the server has permissions to read and access all the data for your model and your map. Specifically, the ArcGIS Server Object Container (SOC) account needs to have read permissions to the map document, the network dataset, and any additional data in the map document. If you have the components of ArcGIS Server distributed among multiple machines, all the above data must be referenced using UNC paths so that all machines can read it. Finally, the SOC account needs read and write access to the server output directory. If you're using the default server output directory installed with ArcGIS Server (C:\arcgisserver\arcgisoutput), then the installation process already applied the appropriate permissions for you.
Follow these steps to publish the services via ArcGIS Server Manager:
Log in to ArcGIS Server Manager and click Publish a map, globe, or other GIS resource as a service.
Tip: There are two wizards in Manager that you can use to publish services. This link takes you to the Publish GIS Resource wizard, which is the simplest way to create a service. It asks you the minimum amount of information needed to create a service.
The other way to create services is the Add New Service wizard. This wizard is the completely manual way of publishing a service; it prompts you for all the service parameters.
Give your service a name. The name you enter here will be used for both the map service and the network analysis service.

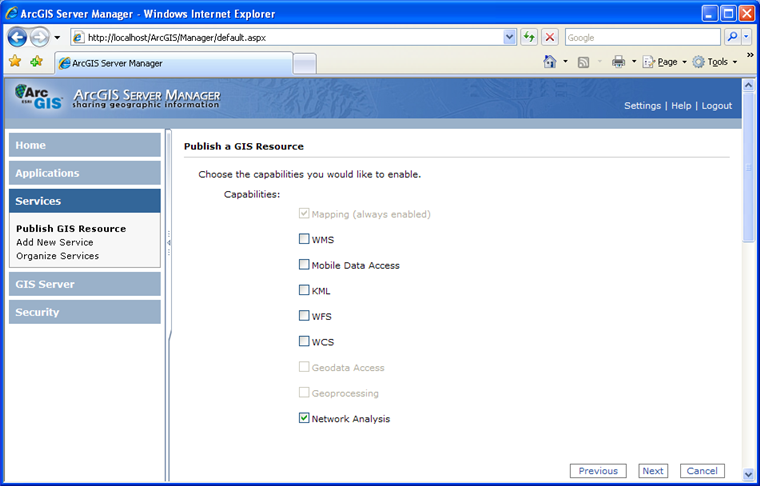
On the second page of the wizard, notice that two capabilities are enabled by default. Mapping is enabled for all map services. Network Analysis is enabled because Manager detected that the map you're publishing has one or more network analysis layers. Publishing a map service with the Network Analysis capability enabled creates an associated network analysis service with the same name. Leave these capabilities checked and click Next to move to the final wizard page.
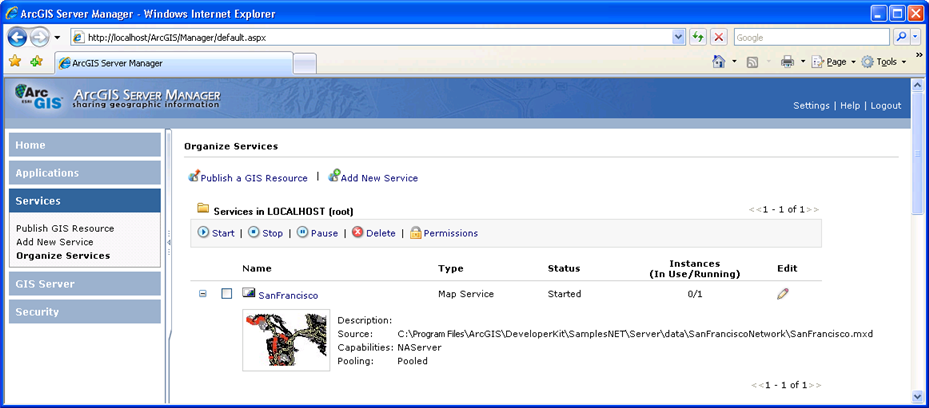
After the service has been published, click Services > Organize Services to see the newly created service. The name is SanFrancisco and the capabilities include NAServer, which stands for Network Analyst Server and means that the Network Analysis capability has been enabled for this service.
Consuming network analysis services via NAServer requires a custom application. The application can be a Web application or task, another Web service, or even a lightweight Windows application.
Regardless of the type of application, the steps to perform the analysis and use the results are the same:
Below are some sample applications that can consume the network analysis service that you created.
Web application samples using the Web Application Developer Framework (ADF)
Desktop client samples using the Server API
Desktop client samples using WSDL