Data support in ArcGIS > Raster data > Designing a raster database
Raster datasets as attributes |
|
|
Release 9.2
Last modified September 22, 2008 |


Print all topics in : "Designing a raster database" |
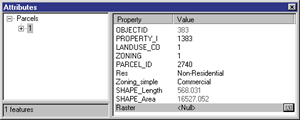
About attributes of type raster
A feature class can have many fields or attributes. There are many valid data types that a field can possess, including text, integer, date, floating point, and even raster. Unlike a hyperlink that simply links a feature’s field to an image, a field of type raster can actually store the raster data within or alongside the geodatabase. For example, you could add a photograph of the commercial property as an attribute of this parcel feature.
To update attributes of type raster, you need to have a feature class that contains a raster field. You can add a field of type raster in ArcMap or ArcCatalog. To add a field of type raster in ArcMap, open the attribute table and add a new field to the table. On the Add Field dialog box, choose Raster from the Type drop-down list.
Learn more about adding fields to tables
Learn more about editing on the Attributes dialog box
Tasks with raster attributes
Creating raster attributes in ArcCatalog
- Click a feature class within a geodatabase.
- Click the Preview tab.
- Click the Preview drop-down arrow and click Table.
- Click the Options button and click Add field.
- Type a name for the new field of type raster.
- Click the Type drop-down arrow and click Raster.
- Edit any of the properties that may need editing.
- Click OK.
| Tips |
|
Updating attributes of type raster
- Add the feature class that has a raster field that needs to be updated into ArcMap.
- Click the Editor toolbar button to show the Editor toolbar.
- Click Editor and click Start Editing.
- Click the Target drop-down arrow and click the appropriate layer.
- Click the Edit tool
 .
.
- Select the feature that needs its raster attribute updated.
- Click the Attributes button
 on the Editor toolbar to show the attributes for the selected feature.
- Click the value for the raster property (the value will either be <Null> or Raster) to select it.
- Click the Show Raster button (the small square to the right of the value for the raster property).
- Right-click in the new window and click Load.
- Navigate to the location of the updated raster dataset.
- Click the updated raster dataset.
- Click Add.
- Close the Attributes dialog box.
- Click Editor and click Stop Editing.
| Tips |
|