Show Navigation
|
Hide Navigation
You are here:
Extensions > PLTS > Creating geodatabases with PLTS > Defining the geodatabase schema
Extensions > PLTS > Creating geodatabases with PLTS > Defining the geodatabase schema
Modifying the repository and generating schema |
|
|
Release 9.2
Last modified August 23, 2007 |


Print all topics in : "Defining the geodatabase schema" |
Related Topics
About the Preprocess Repository tool
The Preprocess Repository tool is located on the PLTS toolbar in ArcCatalog. This tool will only update your Spatial Reference and grid levels for the selected model. Once you have updated your model, the next time you run CASE tools on this model, you will want to select the option "Use values from previous run". This will ensure that the modifications you made to the model will be reflected in the new schema.
How to use the Preprocess Repository tool
- Open ArcCatalog.
- Click the Preprocess Repository button
 on the PLTS toolbar.
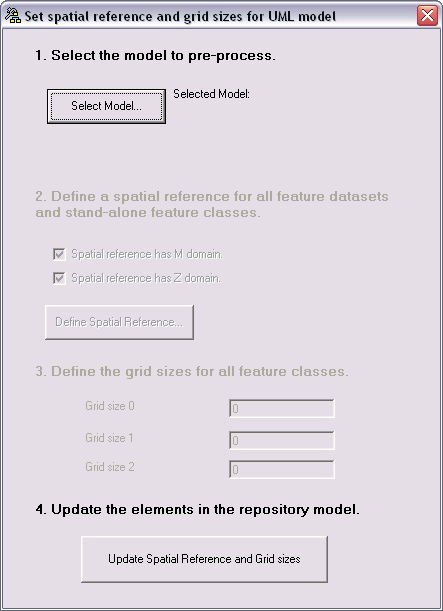
The Set spatial reference and grid sizes for UML model dialog box appears. - Click Select Model to select the model to pre-process.
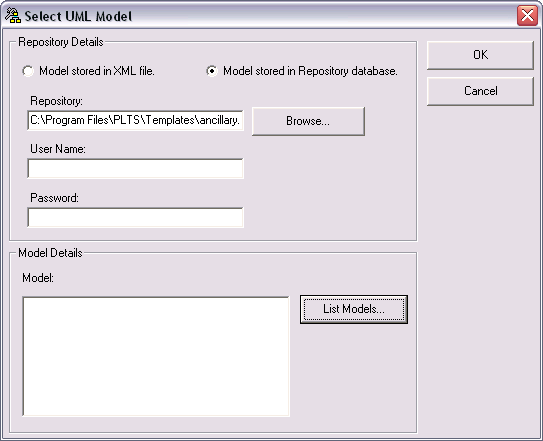
The Select UML Model dialog box appears. - Click Browse to navigate to your repository or enter your connection string if connecting to SQL Server.
- Click List Models.
- Choose your model.
- Click OK.
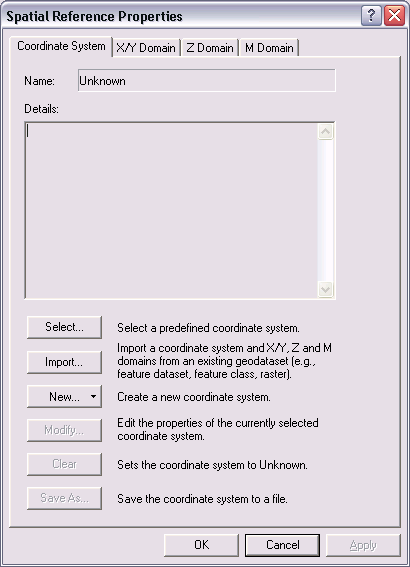
The model will take a few minutes to load depending on the size. You can see it loading in the Model Element box. - Click Define Spatial Reference.
The Spatial Reference Properties dialog box appears. - Define your coordinate system, x/y, z, and m domains.
- Click OK.
- Define the grid sizes for all feature classes.
- Click Update Spatial Reference and Grid sizes.
When finished, an information message box will appear, and the updated information will be stored back into the repository for future use by CASE tools.
You can choose to use an XML, XMI, or database file.
NOTE: If your spatial reference does not require an m or z domain, you can uncheck the checkboxes for the m and z domains under step 2 on the Set spatial reference and grid sizes for UML model dialog box.
(See Creating feature datasets for more information.)
| Tip |
|