Creating buffers |
|
|
Release 9.3
Last modified May 21, 2009 |


|
About creating buffers
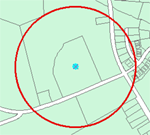
You can create a buffer around selected points, lines, or area features by using the Buffer command. Buffered features are stored in the target layer, which must contain either line or polygon features.
For instance, you might use buffers to show an ecological zone around a waterway, distances from schools or public buildings that certain retail stores are located, or the area around a contaminated well. You can buffer more than one feature at once, but a separate buffer will be created around each feature.
The buffer distance is given in map units by default. You can also give the value in other units by specifying a distance units abbreviation with the value that you enter. To learn more, see Setting distance units.
There are several other ways to create buffers in ArcGIS, including the Buffer geoprocessing tool. While the editing Buffer command creates new features in the target layer in ArcMap, the Buffer geoprocessing tool creates them in a feature class on disk.
How to create buffers
- Click the Edit tool
 .
.
- Click the feature you want to create a buffer around.
- Click the Target layer drop-down arrow and click either a line or polygon layer.
- Click the Editor menu and click Buffer.
- Type the distance in map units to create a buffer area around the feature and press Enter.
A buffer is created at the specified distance.