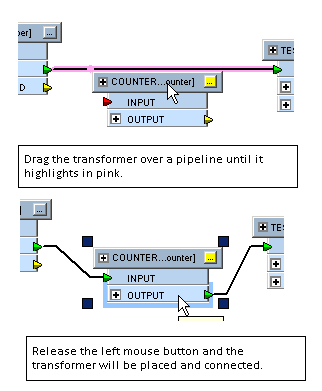
Using the transformer Drag-and-Insert function is the easiest way to insert and connect transformers into an existing workspace. It virtually eliminates the need to manually re-establish connections.
You can "drag and insert" a transformer into an existing connection (or "pipeline"). When you release the transformer, it is set in place. A wizard sets destination node and output port (if there’s more than one). FME then makes feature and attribute connections automatically. If either object has multiple input or output ports, you’ll also be prompted to choose which specific port(s) to connect.
|
Tip: You can change the default port for the automatic input and output connections. See FME Transformers Options. |

You can also insert into multiple pipelines at once by highlighting a transformer input/output port.
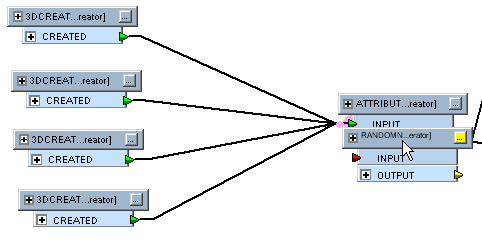
This transformer is dragged to the proper input port (highlighted in pink):
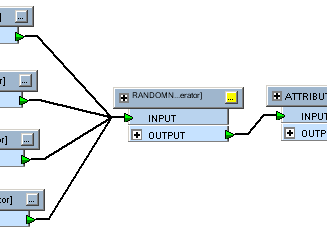
When it is released, the transformer is now in position.
|
Tip – Reversing the Insertion Point:
|
You can connect a single transformer into multiple input ports that require separate connections.
This example shows how to insert a Clipper transformer. In this case, there are multiple input ports requiring separate connections.

The first connection is easy to make with the drag-and-insert function…
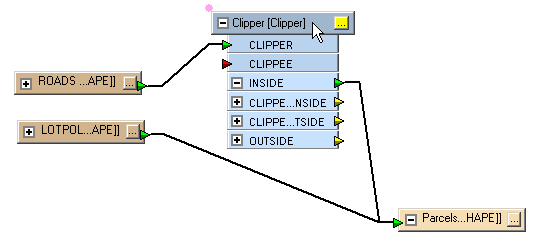
Dragging a transformer that is already inserted still causes a highlight point to appear, and connections to be highlighted. You can make a second insertion with the same transformer, but onto the other link…
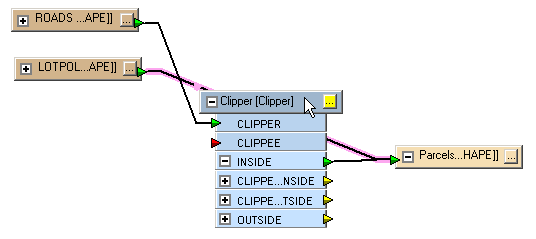
The Clipper is now correctly inserted.
Note: You cannot insert a transformer in a position that would cause a loop in the workflow – such invalid connections will not even be highlighted.
This feature is enabled in Workbench by default. To disable it and use
manual connections only, click the drag-and-insert tool  .
.