 Feedback
 E-mail this topic
 Print this topic
| Ask Questions with Query Layers |
 Feedback Feedback
 E-mail this topic E-mail this topic
 Print this topic Print this topic
|
Query Layers in ArcGIS Explorer allow you to filter the data in a map layer based upon criteria you specify. By creating queries and choosing appropriate criteria you can ensure only the data you are interested in are displayed on the map. For example, you might add a Geodatabase layer containing cities around the world but only want the map to show cities with a population over 1 million. To achieve this, the Query Builder helps you create the query which results in a new Query Layer. No changes are made to the underlying data source, rather you are controlling the amount and type of information drawn on the map. Query Layers can easily be removed or moved and grouped within the Contents window until you achieve the desired effect for your data. You can also use Query Layers as inputs to Analysis Tools in ArcGIS Explorer, or alternatively create Query Layers based on the results of Analysis Tools.
To open the Query Builder select the layer you are interested in within the Contents window then pick the Tools tab on the ribbon and
click the Query button. The layer you select should either be
a point layer (  ),
a line layer (
  ),
an area layer (
  )
map service layer (
 ), or ArcGIS layer
(indicated by the
  symbol).

Query Layers in ArcGIS Explorer follow a standard Structured Query Language (SQL) pattern. The query will show all the features from the layer you selected which meet the criteria you build in the Query Builder. The first part of the query (select all the features from, or SELECT * FROM) is supplied for you by ArcGIS Explorer. By selecting the layer, in this example Mountains, you were choosing the layer upon which this query would operate and allowing ArcGIS Explorer to now say "SELECT * FROM Mountains WHERE...". It is the criteria which follow this command, also known as the WHERE clause, that you will build in the Query Builder.
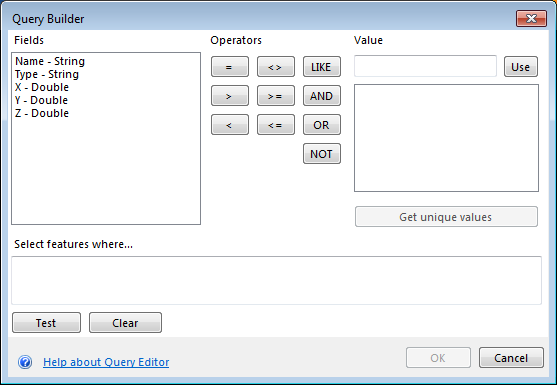
Step 1: Choose a field
When the Query Builder opens you will notice that it has already examined the contents of your layer and listed the attribute fields on the
left hand side.
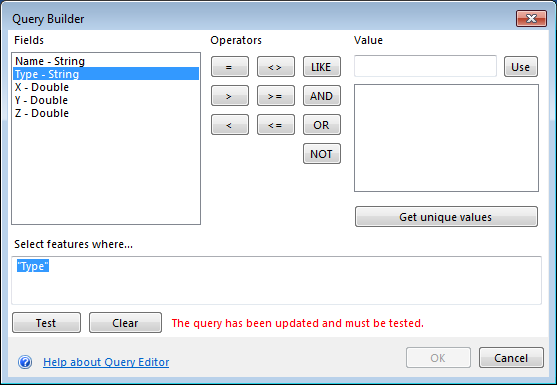
To begin creating your query you should select one of the attribute field names, such as the field "Type" in the example below.
As you do so, you will notice that the field name you selected appears in the query preview box in the lower half of the dialog.
The rest of your query will gradually appear here as you choose further options.
You can also edit the query directly in the preview box if required, for example to delete or copy and paste parts of the query.
Step 2: Pick the operator
Next use the buttons in the centre of the dialog to insert the appropriate query operator, for example click the = button for equals, or the > button for greater than. In the query preview box your query might now resemble "Type" =.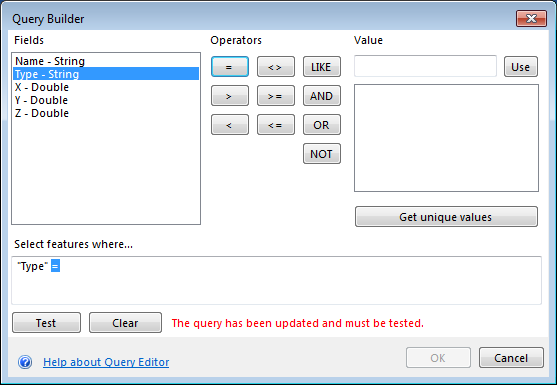
Step 3: Provide a value
In order to help you choose an appropriate value to complete your query, ArcGIS Explorer can search the field you selected for unique values. Click the Get unique values button to start this search. Once the search for unique values is finished, each unique value will be displayed in the list above. To add a value to the query you should select the value in the list. Alternatively if you know the value you would like to add you your query you can type it into the text box above the list of sample values and click Use to add it to the query preview below. Your query might now look something like "Type" = 'Corbett'.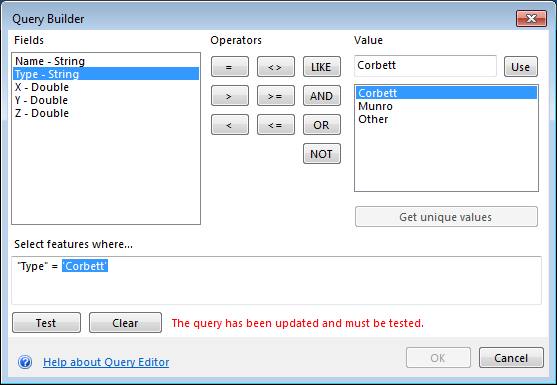
Step 4: Test your query
Once your query is complete you should click Test to confirm that the query is valid. It is possible that your query might return many results, in which case, the dialog will display a message that it has found at least 100 matching features indicating that you might need to consider modifying the criteria in your query.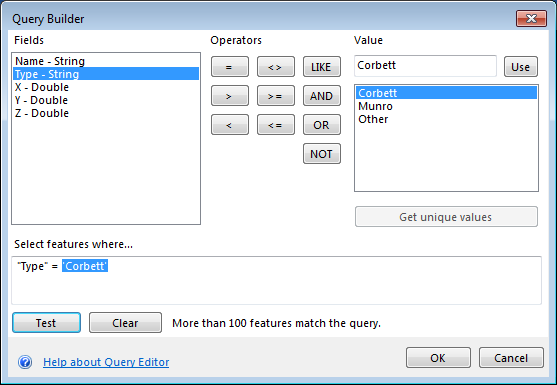
Step 5: Apply your query
Finally, click OK to apply your query to the selected layer and update the map. Your query will appear as a new layer in the map and at the top of the Contents window, sharing the same name as the layer you selected and with the query string appended in brackets for example, Cities ("Population" >= 1000000). This makes it easy to identify the results of your query.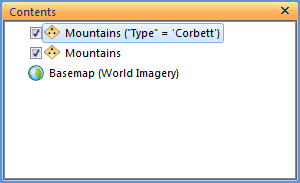
Note: After being created, query layers can be treated like other layers in the map; they can be renamed, moved to a folder, or dragged to a different position in the Contents window or simply removed from the map, using the tools on the Ribbon, or by right-clicking the layer in the Contents window and using the context menu.
When searching string values...
Note: If you use a wildcard character in a string with the = operator, the character is treated as part of the string, not as a wildcard.
When searching numeric values...
Note: Numeric values are always listed using the point as the decimal delimiter regardless of your regional settings. The comma cannot be used as a decimal or thousands delimiter in an expression.
Although the most common operators are conveniently provided for you in the Query Builder, you can write your own SQL statements directly into the query preview box. In this way you can use additional SQL operators, control the order in which different portions of the query string are applied (called operator precedence) or even perform calculations between numeric fields and/or numbers with the arithmetic operators (+, -, *, and /).
You can build more advanced queries by combining individual parts to create compound queries. For example from, you might want to display all the mountains that are Munros and all the mountains that are Corbetts. To do this, you could first create a Query Layer based upon the value 'Munro' then select that new layer and create a second Query Layer with the value 'Corbett'. Alternatively, a faster way to create this query would be to build the first part, "Type" = 'Munro', and then add one of the connectors, in this case the OR connector, and finally add the second part of your query "Type" = 'Corbett' so that your whole query resembles "Type" = 'Munro' OR "Type" = 'Corbett'.