Choosing globe cache properties


Choosing globe cache properties |
|
| Release 9.3 |


|
There are two steps to making a globe cache:
This topic is about setting the cache properties. See Creating globe cache tiles for more about creating the tiles.
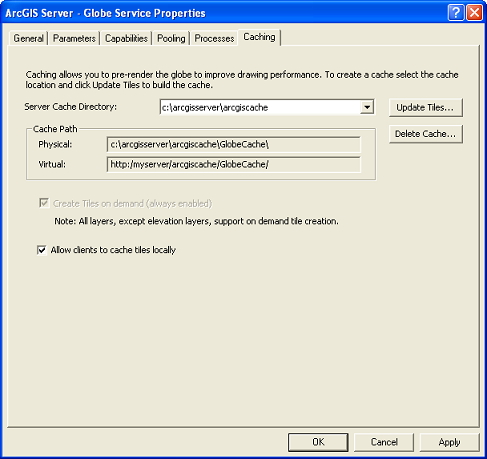
When you view a globe service's properties in ArcCatalog, you will see a Caching tab. This is where you set the properties for your cache. You should make sure these options are correct before you begin creating tiles.
Note: The Caching tab for globe services is not available in Manager.

When you've finished setting the cache properties, click the Create Tiles button to start creating tiles. You can also return to this dialog box later and click Update Tiles to create more tiles or update existing ones.
The Caching tab contains the following globe caching options:
Here you can change the default server cache directory that was selected when you created the globe service. To learn more about the server cache directory, see How globe caches work.
Tiles are always created when users navigate the globe, so the option to create tiles on demand is always enabled. For elevation layers, you cannot rely on users navigating the globe to create the cache; you must create the full cache using the globe cache generation tools.
Finally, you have the option to allow clients to cache tiles locally. When users navigate your globe service, by default, the tiles are stored on their local machines. This can improve performance if they tend to navigate the same areas. However, once you update your globe cache their tiles will be outdated and they will explicitly need to clear their local caches before they can see the changes. If you will be updating your globe cache frequently, consider not allowing users to cache tiles locally.