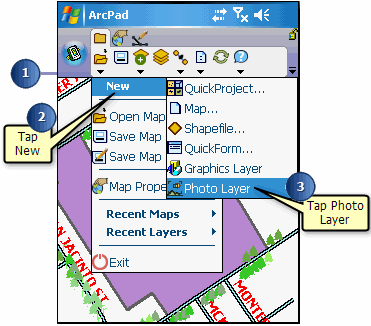
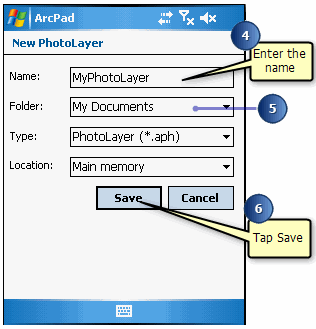
Steps to create a photo layer

Release 8 E-mail This Topic Printable Version Give Us Feedback

  1. On the Main toolbar, tap the drop-down menu, below the Open map button.
  2. Tap New to open the New sub-menu.

  3. Tap Photo Layer. The Save As dialog box will be displayed.
  4. Enter the name for your new photo layer in the Name input field.
  5. Tap the Folder drop-down list to select the folder on your device which contains the photos for your photo layer.

  6. Tap Save when you have entered all the necessary information.

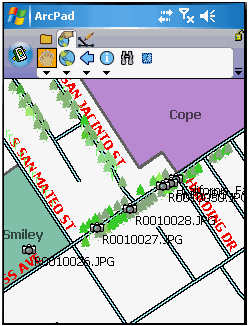
    The new photo layer will be added and displayed on the map. By default, a camera symbol is used for each photo position, and is labeled with the photo file name.

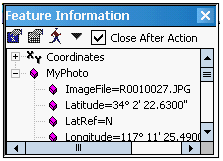
    Optionally use the Identify tool to select a photo and view the photo’s attributes in the Feature Information dialog box.