The Go To Selected Feature tool can be used to select a navigation destination by
using the Select tool on the Edit toolbar. Select a feature from an editable layer
and tap the Go To Selected Feature tool.
-
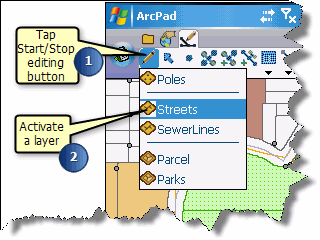
Tap Start/Stop Editing button on the Edit toolbar.
-
Activate a layer for editing, by selecting it from the available list.
-
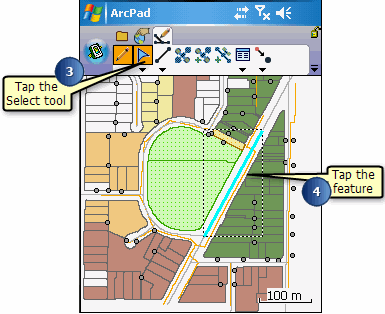
Tap the Select tool on the Edit toolbar.
-
Tap the feature on the map that you want to select for your navigation
destination.
The selected feature is highlighted with a dashed box, showing the extent of
the feature.
-
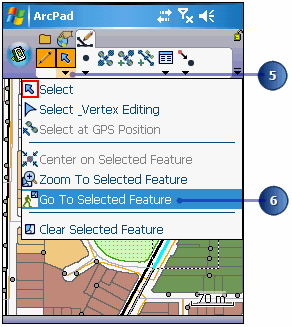
Tap the arrow below the Select button to display the drop-down list.
-
Tap Go To Selected Feature.
-
The destination is displayed with a Mark label.
-
Use the GPS Position Window to view the distance (DST) and bearing (BRG) from
your current GPS position to your selected destination.
Tip
Selecting vertical or horizontal lines: Increase the Pen
Tolerance if you are having difficulty selecting a horizontal or vertical
line feature. The Pen Tolerance can be set in the Display page of the ArcPad
Options dialog box.
Tip
Displaying the Edit toolbar: The Edit toolbar is
automatically displayed when a layer is checked for editing. You can also
open the Edit toolbar by using the Toolbars list, located on the drop-down
list to the right of the Tools button on the Main toolbar.
Note:
Refer to section ‘Editing basics’, for more information on
the editing tools and editing features.