A radial traverse uses 1 fixed reference point to create a traverse relative to that
fixed point. In other words, you begin at point A and capture the points around the
perimeter of A. You are always standing at the same fixed point but you are
capturing multiple vertices.
-
Make the polyline or polygon layer editable using the Start/ Stop Editing tool.
-
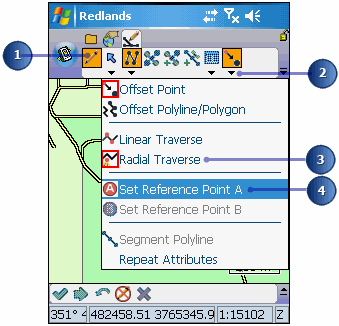
Tap the drop-down arrow next to the Offset Point button.
-
Tap Radial Traverse.
-
Tap the drop-down arrow next to the Offset Point button.
-
Tap Set Reference Point A.
-
Tap the screen to set the reference point.
Tip
Enabling the traverse tools: The Linear and Radial
Traverse tools will only be enabled if a polyline or polygon layer is set as
editable.
Tip
Using a GPS to set the reference points: ArcPad will
automatically use the current GPS position for the reference point if data
is received from a rangefinder and there is no current reference point
defined, and either Offset Point, Linear Traverse, or Radial Traverse are
enabled.
-
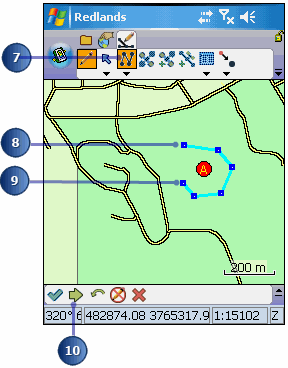
Tap the drop-down arrow next to the Point button and select the Polygon -or
Polyline -feature type.
-
With a rangefinder, shoot the target (first vertex) from Reference Point A.
The Point/Vertex dialog box is displayed on the Offset page.
-
Continue shooting your vertices from Reference A.
-
Tap Proceed when you are finished creating your line or polygon.
The Feature Properties dialog box is displayed with an edit form, if it
exists. Enter the information for the new feature.
-
Tap OK.
-
Your new feature is created.
Tip
Undoing or cancelling your edits: Use the Undo tool to
go back a step to the previously captured vertex or use the Cancel Edits
tool to erase all edits. These tools are only enabled prior to tapping the
Proceed button. Once you tap the Proceed button and tap ok on the Feature
Properties dialog box, your edits cannot be undone.