Steps to Get Data For ArcPad


Steps to Get Data For ArcPad |
|
| Release 8 |
|
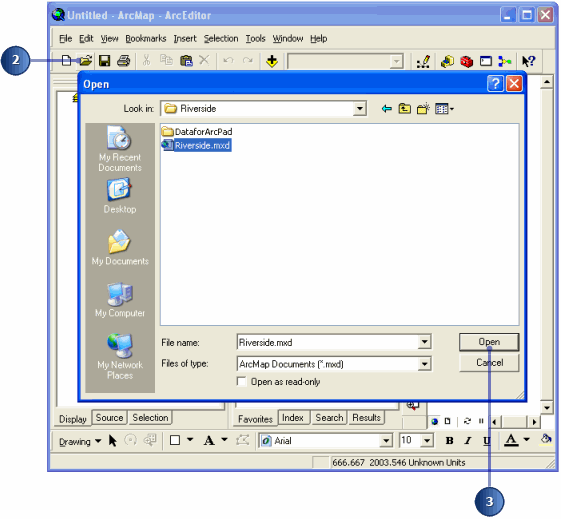
In this task you will use the ArcPad Data Manager for ArcGIS to select and extract data for editing in ArcPad.
The ArcPad Data Manager toolbar should already be activated. If the toolbar is not activated, it can be done so by selecting the ArcPad Data Manager extension in the Tools > Extensions dialog box

 .
.
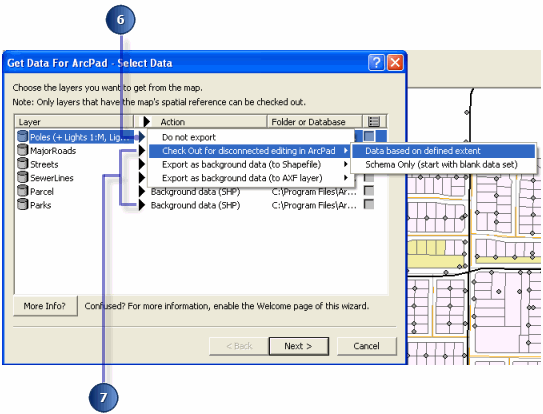
The Get Data For ArcPad dialog box allows you to select which layers in your map you want to extract for use in ArcPad. Layers can be selected for display purposes by chooseing the Copyout as Background data (as either AXF or shapefiles). Background data can not be checked in. Layers can also be checked out for editing (and subsequent edits checked back in) Only geodatabase feature class layers can be selected for editing in ArcPad. Any related tables associated with the layers selected for editing in ArcPad will also be included in the output ArcPad AXF file. The Get Data for ArcPad dialog box shows any relationship classes that are associated with the layers in the map. In this exercise we will only be editing the Poles layer, while all other layers will be selected for display only.
A summary will appear when the Get Data for ArcPad process is completed.
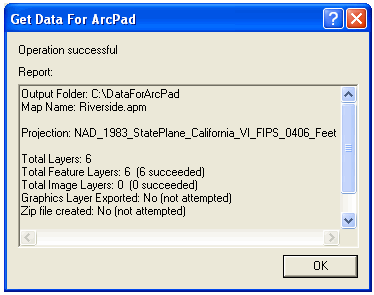
The summary lists the output folder and map name; the projection of the output data; and the number and type of layers that have been extracted for use in ArcPad.
You have completed the task of extracting data for use in ArcPad, and are now ready to start the next task of editing this data in ArcPad.