To publish an arcpad project you need:
- Map document (mxd)
- ArcPad configuration file (apo)
These two files must be saved in a location from where they can be
accessed by ArcGIS Server. The publication process is the same as is for any ArcGIS
Server Map Service.
To learn more about Map Services, refer to the following
link.
To learn more about Publishing a GIS resource to the server (using ArcCatalog) refer
to the following link.
Note
The ArcPad Extension for
ArcGIS can only be used to publish data via ArcCatalog. The ArcGIS Server Manager
cannot be used to publish ArcPad data.
In order to publish your
project:
-
Open ArcCatalog by clicking, Start > All Programs > ArcGIS > ArcCatalog
-
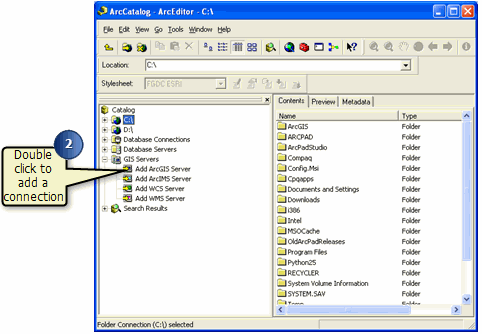
If you do not have a connection, double click on ' Add ArcGIS Server', as
shown above.The following screen appears.
-
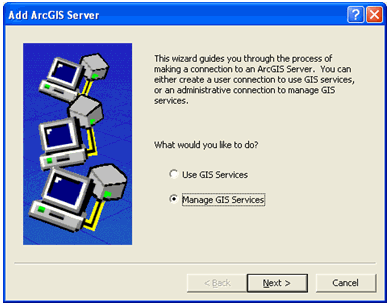
Choose the option 'Manage GIS Services', and click 'Next'. The following
screen appears.
-
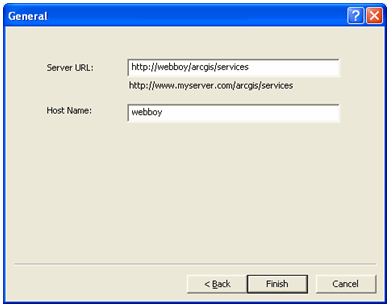
Enter the connection details for your ArcGIS Server and click finish. The
Server URL should be of the form http://<yourgisservermachinename>/arcgis/services and the Host name
should be of the form <yourgisservermachinename>. Click 'Finish' and
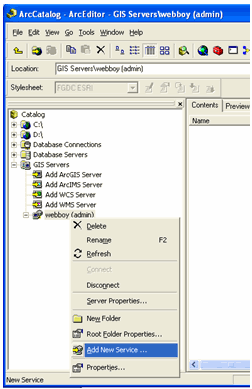
the server you just created will be added in ArcCatalog. To add a map service
(which will contain your arcpad publication), right mouse click on the ArcGIS
server, you just created and choose, ‘Add New Service’, as shown below.
Note
The Server URL
<http://yourgisservermachinename>/arcgis/services is used to
connect internally for publishing. For external access, the Web URL would be
http://www.myserver.com/arcgis/services.
-
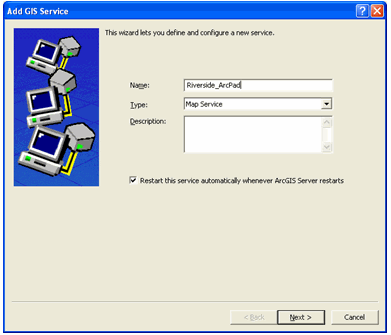
Give your map service a unique name. In this case the name is
‘Riverside_ArcPad’. See the screenshot below
-
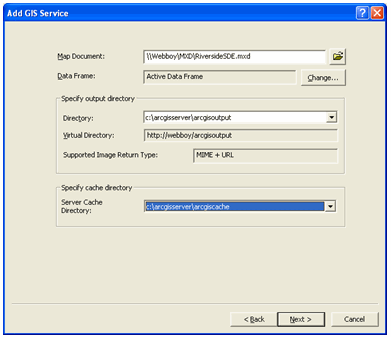
When you hit 'Next, the following screen appears.
-
Browse for the Map Document, which you previously configured with the Get Data
for ArcPad wizard for publication to ArcGIS Server. In this example it is \\Webboy\MXD\RiversideSDE.mxd. Now select the server cache directory,
in this example the default value listed in the drop down list is chosen.Click
next.
Note
The map document file path must be accessible across a
network, so it should take the form of \\ server name\filename.mxd.
-
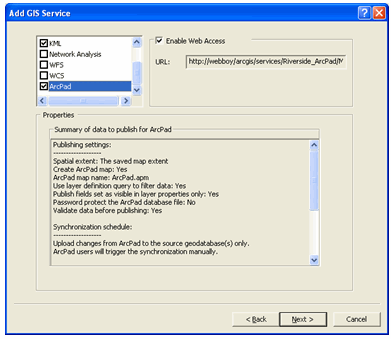
The following screen appears:
-
Select the ArcPad service from the list in the top left hand corner of the
dialog, as shown above. Once the service is selected, a summary of the contents
of the configuration file is displayed in the properties dialog. Ensure that
this is the configuration you wish to publish and click 'Next'. The following
screen appears.
-
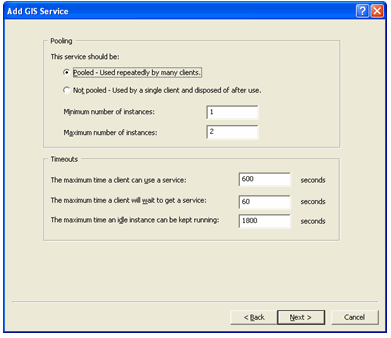
Choose the pooling and timeout requirements on this page. For this example,the
values are kept default.Click 'Next' and the following screen appears.
-
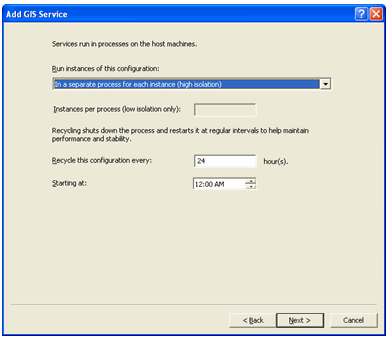
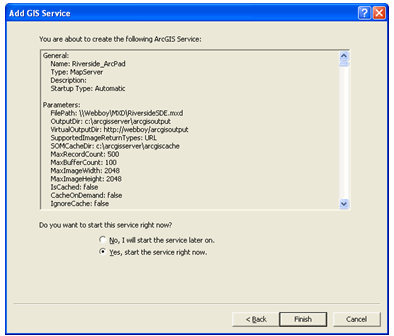
Choose the process preferences on this screen. The values are kept default in
this example. Confirm the service you are about to create now, and choose to
start the service right now. Click finish. The following screen appears.
-
Your data is now published on the Server.


