Only data stored in an SDE database, can be published to ArcGIS Server and all
layers contain global id's. The database must also be versioned.
To learn more
about SDE refer to the following link.
What is ArcSDE
To learn more about versioning refer to the following link.
Understanding versioning
You can import any existing shapefiles, personal geodatabase or file geodatabase
layers into sde for publishing to ArcGIS Server. For more information on importing
refer to the following link.
An Overview of importing datasets
The data and screenshots used in this exercise are from the Riverside sample data
supplied with ArcPad 8.0. To demonstrate publication,the contents of the Riverside
personal geodatabase have been imported into an SDE geodatabase, and a version
created from it.
The following steps show you one way of importing the
Riverside personal geodatabase layers into an existing SDE database,for use in this
exercise. There are other methods also, please use the method you are comfortable
with.
-
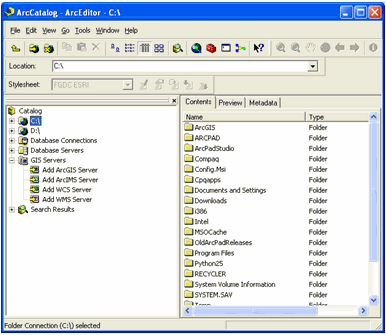
Open ArcCatalog.
-
If you do not already have a connection, choose to add a database connection
(expand database connections, and double click on Add Spatial Database
Connection), as shown below.
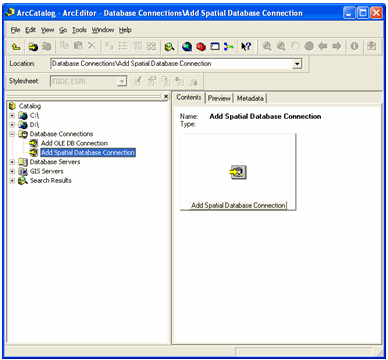
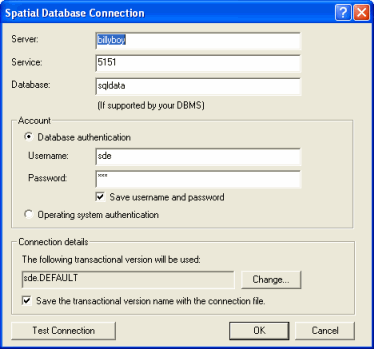
-
When you click on 'Add Spatial Database connection, the following screen
appears. On this page enter your server details, and click OK.
-
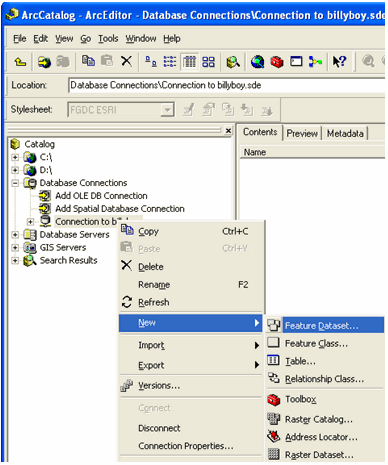
Your database connection will now be listed under Database Connections in
ArcCatalog. Now, you will create a new feature dataset to store your feature
classes.
-
Right mouse click on the newly created database connection, in this example the
new connection is (billyboy), and choose to create a new feature dataset, as
shown below.
-
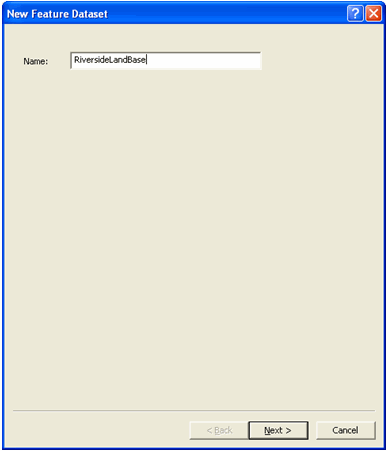
Name the feature dataset as RiversideLandBase, as shown below.
-
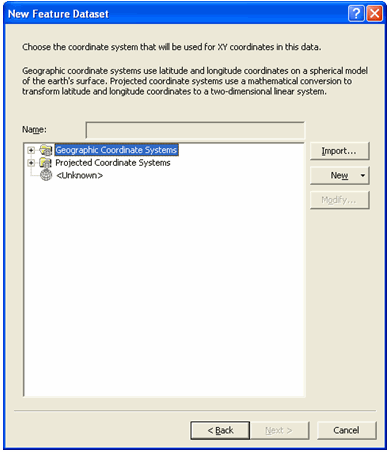
When you hit 'Next' the following screen appears.
-
On this screen, choose to import the coordinate system from the Riverside
personal geodatabase (this will ensure that the correct coordinate system is
chosen). To do this Click import and the following dialog will appear.
-
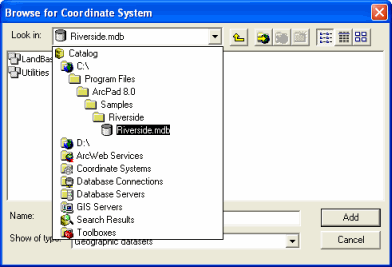
In this dialog, browse to the Riverside sample data installed with ArcPad 8.0,
as shown above. Double click on Riverside.mdb and choose one of the layers that
are stored in the LandBase feature dataset and click 'Add'.
-
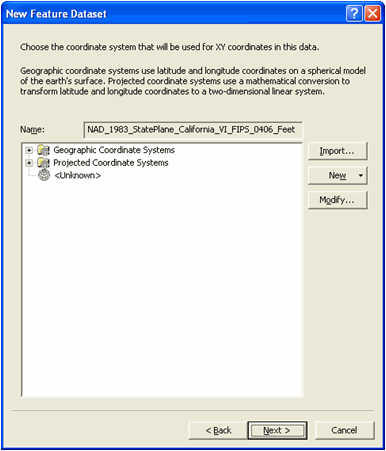
The coordinate system will now be listed in the name edit box as shown below.
Click next.
-
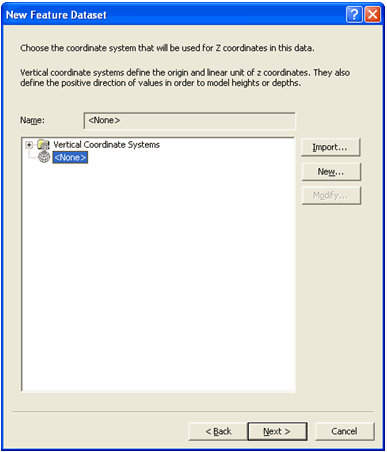
On the next screen you can choose the coordinate system. For this exercise,
accept the default value <none> for the coordinate system used for z
coordinates, as shown below.
-
Click 'Next' and the following screen appears.
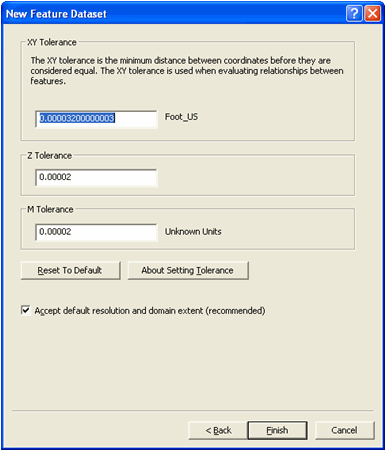
-
For this exercise, accept the default tolerance value as shown above. Click
Finish. Your feature dataset is now created.
-
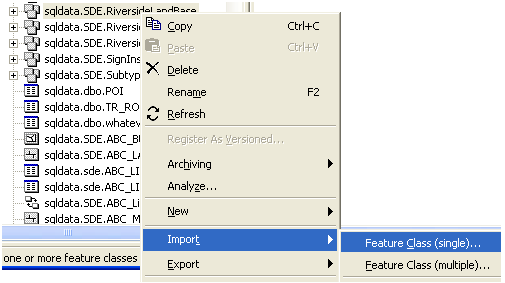
Now you are ready to import feature layers into the feature data set. In
ArcCatalog, right mouse click on the newly created feature dataset
RiversideLandBase. Choose the option of ‘Import’ then choose ‘Feature Class
(single)’ as shown below.
-
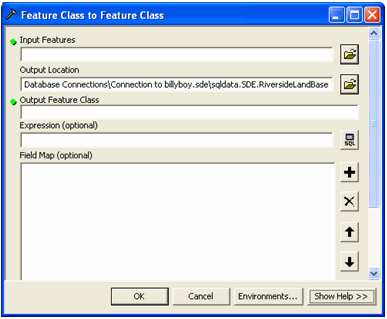
The Feature Class to Feature Class ArcToolbox tool appears, as shown below.
-
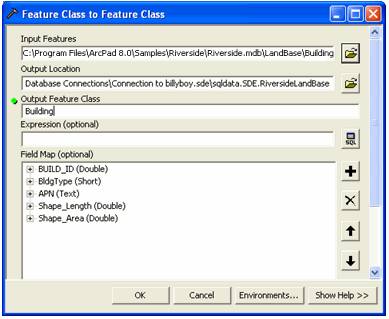
Use the browse button, to browse to the ArcPad 8.0 Riverside sample personal
geodatabase. Open the LandBase feature dataset and select the Building layer.
Click ' Add', as shown below.
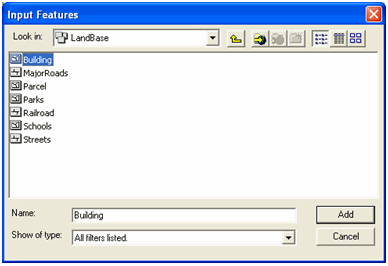
-
The selected layer will be listed in the Input Features edit box. Next type the
name ‘Building’ in the Output Feature Class. Note that the output name needs to
be unique to the geodatabase (not just the feature dataset). If your geodatabase
already has a layer called ‘Building’, enter a different name here. Click Ok.
See the screen shot below:
-
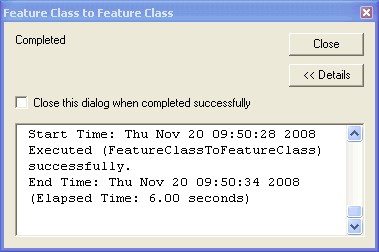
Once the conversion is completed, the following dialog will be displayed. Close
the dialog.
-
Repeat steps 14 to 18 to import all of the LandBase feature classes.
-
Repeat steps 5 to 13 to create a new feature data set called
'RiversideUtilities'. In this feature data set import all of the Utilities
feature classes from the ArcPad 8.0 Riverside sample personal geodatabase.
-
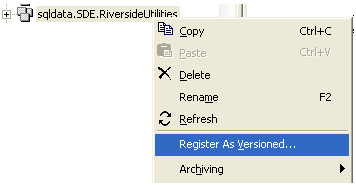
Before the SDE database can be used in an ArcPad Publication it must be
‘versioned’. You must register each feature data set as versioned. In
ArcCatalog, right mouse click on the feature dataset. Select ‘Register As
Versioned' as shown below.
-
The following dialog box appears. Do not check this option. The Feature Class
must be versioned without the option to move edits to base. Click ok.
-
After registering each feature data set, you are ready to use your SDE
geodatabase.
-
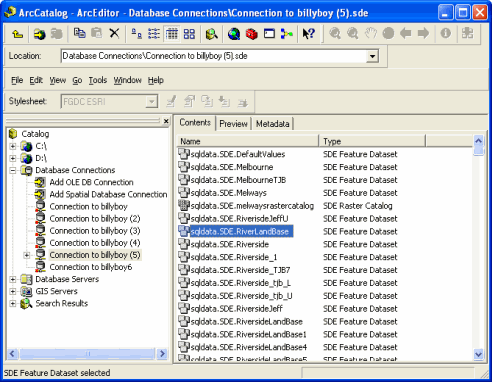
It is a requirement that Global IDs must exist for SDE layers, when you are
running the ArcPad wizard in Server mode. To add Global IDs, open ArcCatalog and
double click on the database connection you just made, this will open the
dataset you just created, as shown below.
Note
Ensure ArcMap is closed when you are adding Global IDs in
ArcCatalog.
-
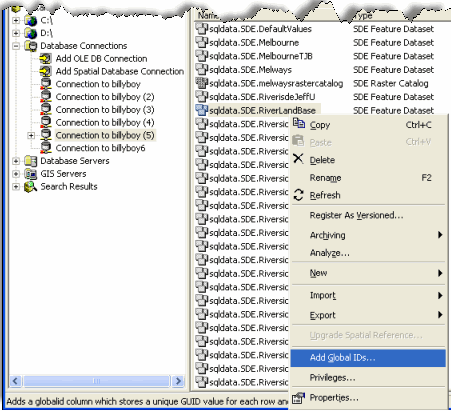
Now right click on the dataset you created and click on the option 'Add Global
IDs'.In this example the database connection is billyboy and the dataset is
RiversideLandBase. See the screenshot below.
-
A requirement of the 'Author Project for ArcGIS Server' tool in ArcMap is a Map
Document. The simplest way to prepare a Map Document with your SDE layers is to
start with the sample Riverside.mxd supplied with ArcPad 8.0. Change each
layer's data source, and save the Map Document. Open the file C:\Program
Files\ArcPad 8.0\Samples\Riverside.mxd in ArcMap.
-
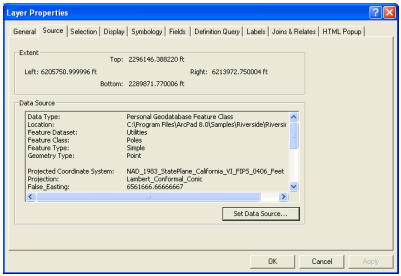
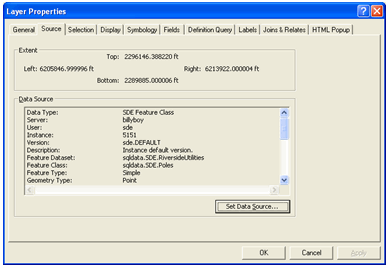
Open the layer properties dialog for the Poles layer, and click ‘Set Data
Source' as shown below.
-
Browse to your newly created Riverside versioned SDE geodatabase and select the
poles layer, as shown below. Click 'Add'.
-
You can now see that the data source for the layer is now an SDE feature class,
as shown below. Click OK.
-
Repeat steps 26 to 28 for each of the layers in the map document.
-
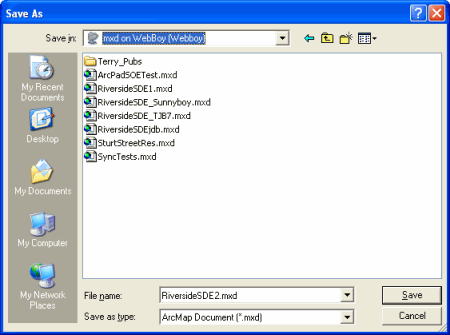
Save the map Document as RiversideSDE.mxd to the location of publication,
whichis your server. This is the map document you will use in the following
exercises to create an ArcPad Publication.
For instance, in this tutorial the mxd is saved on the server 'Webboy', as
shown in the screenshot below.
Note
It is recommended to create a folder for MXD and APO files on
your server to save the files respectively. For quick access save the map
document on the server. If you choose to save the MXD on your local drive,
ensure it is accessible across your network.