Harvesting Quickstart
This section provides a brief exercise that shows how to run the Harvesting Tool in the desktop mode and how to harvest metadata from an established CS-W repository. This exercise harvests from Geospatial Onestop. Note that you must be an Administrator or a Publisher user in your Geoportal to run the Harvesting Tool. For information to provide to organizations that want to harvest your geoportal, see the connection information section below.
-
Install the Harvesting Tool.
Please see the Geoportal Extension 9.3.1 Installation Guide.
-
Launch the Harvesting Tool
by clicking Start > All Programs > ESRI > Portal > Harvesting Tool.
-
Set up the Harvesting Session
- Click the Harvest tab.
- Click the CSW button in the Protocol section if it is not already selected.
- In the URL/Host field, type the URL of the CS-W service (e.g. http://www.geodata.gov/Portal/csw202/discovery?request=GetCapabilities&service=CSW&version=2.0.2).
- Specify a number in the "Max Documents to Harvest" field. This is important because there are thousands of records on Geospatial Onestop, and if you do not specify a max record count, the Harvesting Tool could be running for hours. For this example, enter '5'.
- In the CSW Profile field, select the profile that the CS-W service uses. It is often possible to find out the profile by pasting the CS-W url from the URL/Host field into a browser, and reading information that displays. The profile that Geospatial Onestop uses is "ArcIMS 9.3 CSW 2.0.2 OGCCORE".
-
Set up the Publish Session
- Click the Publish tab.
- Enter the URL for the Publish Service, replacing the bold italic text with information for the Geoportal to which you want to harvest. Typically this is "http://
Geoportal9.3.1_ServerName:port/Geoportal9.3.1_Application_Name/
HarvestPublish.do"
- Enter the user name for the administrator or any other user with publishing privileges to the Geoportal, and his/her password in the User/Password fields.
- Enter the name of the publisher who will own the harvested data.
-
Set Options
- Click the Options tab
- Check the box for "Publish Metadata to Portal" if you want the harvested documents to automatically publish to your Geoportal.
- Check the box for "Save Metadata to Folder". This option will save a copy of the harvested documents to a specified folder.
- Navigate to this folder using the "Output Folder" browse field. If you want to overwrite metadata records already stored in that folder, check the "Overwrite Metadata" box.
-
Harvesting
- Now that you have set up your harvest and publish specifications, you are ready to harvest. To initiate the process, click on the "Harvest" button. Harvesting, followed by publishing and/or saving to your output folder, will automatically start.
- During the harvesting process, the status bar at the bottom left of the Harvesting Tool window indicates progress of your harvesting operation (e.g., harvested 1 of 5 documents, harvested 2 of 5 documents).
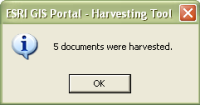
- The Harvesting Tool message box informs you of the number of documents that were harvested.
After Harvesting is completed, open the Geoportal and login as the Geoportal Administrator.
Verify that all records have been published by opening the Manage Metadata form and search for posted records. Several records (5) should have today's date and a status of posted. These are the records that were published in your Geoportal from Geospatial Onestop using the harvesting tool.
Connection information for other geoportals to harvest yours
If another organization wants to harvest your 9.3.1 sp1 geoportal with the Geoportal extension Harvesting Tool, this is the information that you should provide to them:
-
Protocol: CSW
-
CSW url (replace serverName with your geoportal's web server name, and port number if necessary): http://serverName:portNumber/geoportal/csw/discovery?Request=GetCapabilities&Service=CSW&Version=2.0.2
-
Profile: ArcGIS Server Geoportal Extension


