Find Address task


Find Address task |
|
| Release 9.3.1 |
|
The Find Address task prompts the user for an address and displays the address on the map. It can be configured with an ArcGIS Server geocode service, an ArcIMS service with geocoding enabled, or Bing Maps.
The Find Address task is based on an address locator service. This can be an ArcGIS Server geocode service, an ArcIMS geocode service, or a Bing Maps service.
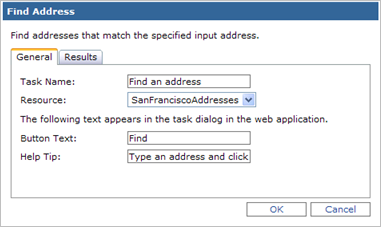
Once you add a Find Address task to your application, you need to specify the locator service using the Supporting Services link. Use the Add GIS Server link to connect to the server containing your locator. If you need help navigating this dialog, see the instructions in Selecting services to display.
If you select a geocode service from ArcGIS Server 9.2, the coordinate system of the geocode service must match the coordinate system of the map. If you use a geocode service from ArcGIS Server 9.3, it can have any coordinate system. The 9.3 geocode service has been enhanced to return the task results in the coordinate system of the map.
A Bing Maps service can be very useful for the Find Address task because the service is configured to find well-known places that may not have a well-known street address (for example, "Lincoln Memorial"). If you select the Bing Maps service, your map must include a Bing Maps layer or a layer that uses the Bing Maps coordinate system (WGS 1984 Web Mercator). This layer must be the Primary Map Resource, meaning that the map is configured to use the layer's coordinate system.
The number of text boxes and the text you see on the user interface for the Find Address task come from the locator itself. You can change the text by opening the locator (.loc) in a text file before publishing it to the server. Changing it in the locator, however, will also change how the text appears in ArcGIS Desktop.
Search for the text FieldAliases. For instance:
FieldAliases = Zone
Edit the field alias. For example, you might change Zone to ZIP Code:
FieldAliases = ZIP Code
To change the default name and wording in the Find Address task, you can do the following:
Note: When searching a composite locator, the Find Address task searches all the individual locators that comprise the composite locator. This behavior is mentioned here because some ArcGIS Desktop tools that perform batch geocoding stop searching a composite locator once a match is found.