Tutorial: Publishing an image service


Tutorial: Publishing an image service |
|
| Release 9.3 |
|
This tutorial walks you through publishing a collection of images as an ArcGIS Server image service using the ArcGIS Image Server extension. In ArcMap, you will use ArcGIS Image Server tools to create a compiled image service definition and will publish it using ArcGIS Server. Upon finishing the steps, you'll be able to view the image service in ArcMap.
Why should you publish your image service through ArcGIS Server? ArcGIS Server allows you to make your image services available over the Internet by supporting HTTP connections.
This tutorial uses the tutorial data that comes with the ArcGIS Image Server extension. By default, it's installed in C:\ImageServerTutorial on Windows. If you did not install it there, please make the appropriate path changes throughout this tutorial so it works properly for you.
Note: If ArcGIS Server is on a machine separate from this tutorial data, you will have to share the tutorial data folder and give the SOC account permissions. This may involve creating a local version of the SOC account as explained in Preparing resources for publishing.
To complete this tutorial, you need to have the following:
In this part of the exercise, you'll create an image service definition containing GeoTIFF raster dataset files using the New Image Service Wizard.
You create new image service definitions using tools within ArcMap.
You need to add the Image Service Definition Editor toolbar to your ArcMap window to create and edit image service definitions.

The New Image Service Wizard walks you through all the steps necessary to create a compiled image service definition for most raster types.
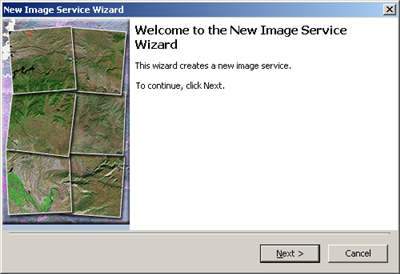
Click the Image Service drop-down menu on the Image Service Definition Editor toolbar and click New Image Service. This opens the New Image Service Wizard. Click Next to start working through the wizard.
Click OK to close the Spatial Reference Properties dialog box. The service type you will be creating is a color image service, since there are three bands in the GeoTIFF files that you will be adding. If there were only one band, you would be creating a panchromatic image service.

Navigate to C:\ImageServerTutorial\Data, click the Amberg_tif folder, then click OK.

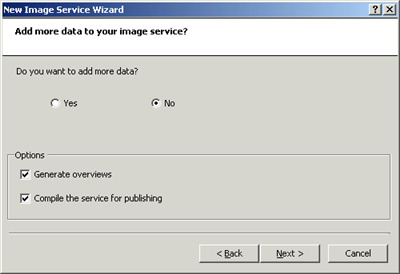
Click Next. Do not make any changes on this page. Service overviews are created to optimize the image service by allowing the service to display quickly at all scales. Compiling the image service definition creates a compiled file (AmbergService.ISCDef) that is used to publish the image service.
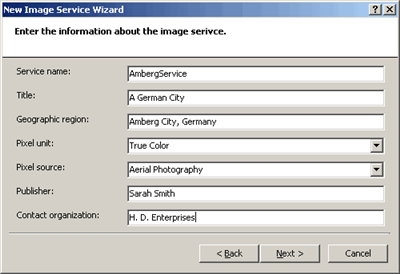
Type "Hot Dog Enterprises" in the Contact organization text box.
Click Next and review the information about the image service you will be creating.
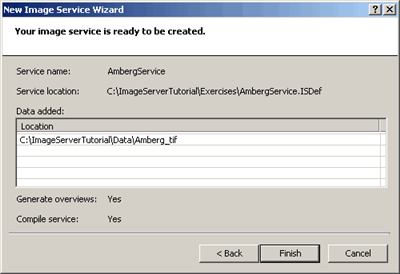
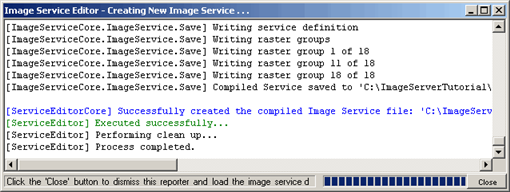
Click Finish. The Image Service Editor window opens. You can watch the progress of the image service definition being created.
If you were creating the image service definition using the Advanced options, you would perform each of the steps displayed in this status separately.
When the creation of the new image service definition is complete, you will see the message "Process Completed" in the Image Service Editor window.
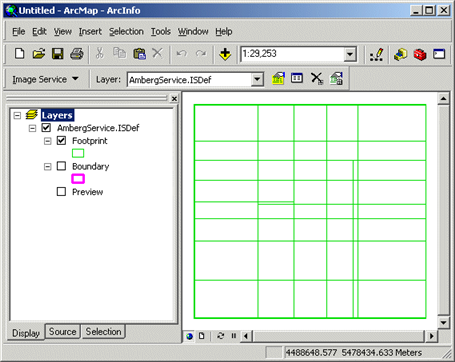
The image service custom group layer, AmbergService.ISDef, is added to the ArcMap table of contents. It contains the Footprint, Boundary, and Preview layers. The Footprint layer contains the footprints of each raster dataset in the image service definition, including the GeoTIFF files that were added and the service overviews that were created. The Boundary layer contains a polygon representing the extent of every dataset in the image service definition. The Preview layer can be used to preview the image service and the information about the image service that clients can access.
In these next steps, you'll remain in ArcMap and preview the image service you created:
You have created an image service definition and previewed how it will appear when it is published. You're now ready to publish the compiled image service definition using ArcGIS Server.
You will be configuring the ArcGIS Image Server server and service provider and configuring ArcGIS Server to link to the ArcGIS Image Server server.
To publish the image service definitions created using the ArcGIS Image Server extension, you need to configure the server and service provider components of the extension. The server is registered with the SOM. It acts as the request broker for ArcGIS Image Server connections. It provides load balancing and failover support of connection requests between different service providers.
The service provider is the central processing unit (CPU) that processes the components of the image service definition and distributes the data to the client. Service providers perform on-the-fly processing defined in the image service definition. ArcGIS Image Server scales to support heavier loads by using additional service providers that run in parallel. Each service provider can provide multiple image services. The service provider's architecture is multithreaded, with each request running in its own thread, so multiple requests are processed simultaneously on multicore machines.
In this part of the tutorial, you will publish the compiled image service definition you created. You will also access this image service in a client and examine its properties.
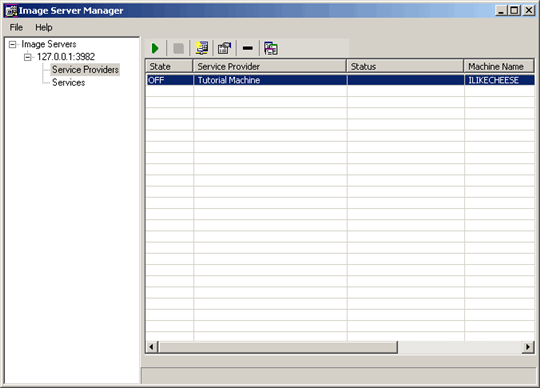
The Image Server Manager is used to configure and manage the server and service providers. This application has tools that allow an administrator to configure, view the status of, start, and stop the server and service providers as well as export or review log files.
Type "127.0.0.1" in the Host machine text box.
There are only three options for naming the Host Machine: It can be the machine's name (for example, the browse name on the network), the machine's IP address, or the default 127.0.0.1.
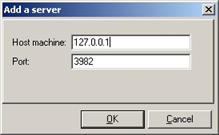
3982 is the default port number for an ArcGIS Image Server server.
The Image Server Manager is used to configure and manage service providers. When you define the computer, port number, and other configuration parameters for a new service provider, this information is saved in a <service provider name>.ISPConfig file stored in C:\Documents and Settings\All Users\Application Data\ESRI\Image Server\Server.
Type "Tutorial Machine" in the Service provider name text box.

Click Tutorial Machine under the Service Provider column to select the row.
Here you will be making an administrative connection to an ArcGIS Server and you will be registering the Image Server component you set up earlier with the Server Object Manager.
You're now ready to publish your compiled image service definition using ArcGIS Server. Follow these steps to create the ArcGIS Server image service.
Now that you've published your ArcGIS Server image service, it can be viewed by client applications across the Internet or Intranet. ArcMap is one of those clients. To view the image service in ArcMap, follow these steps: