Tutorial: Publishing a WMS service


Tutorial: Publishing a WMS service |
|
| Release 9.3.1 |


|
This tutorial walks you through the process of publishing an ArcMap map document (.mxd) as a WMS service. WMS is a specification published by the Open Geospatial Consortium (OGC) for serving map images on the Internet. If you're new to WMS and want to learn more about it before attempting this tutorial, see WMS services.
Before beginning this tutorial, you'll need to have a .mxd ready in a shared location visible to all server object container (SOC) machines in your GIS server. The SOC Account you created during the post install must also have permissions to read the map document and all of the data that the map document references.
These steps explain how to publish a WMS service in ArcCatalog. You'll later use ArcCatalog to test your new WMS service. You could alternatively publish the WMS service in ArcGIS Server Manager and test it in any WMS client application. For example, web applications that you build with Manager can display WMS services.
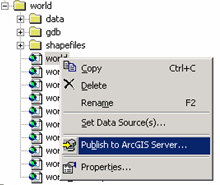
Right-click the map document and select Publish to ArcGIS Server from the context menu. You'll see a brief wizard that will prompt you for the minimal amount of information needed to create the map service. After you publish the service you can go back and configure additional properties if you want.

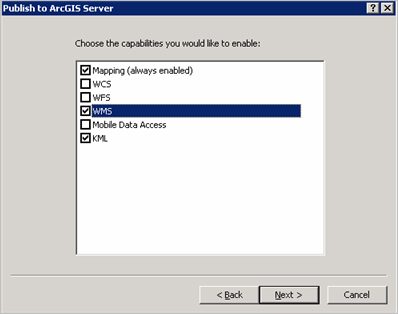
In the second panel of the Publish to ArcGIS Server wizard, check the WMS capability, then click Next. Enabling the WMS capability allows clients to request maps from your service through WMS specifications.

Your map service has now been published and can be previewed in ArcCatalog by first selecting your service in the Catalog tree, then clicking the Preview tab in the adjacent panel.
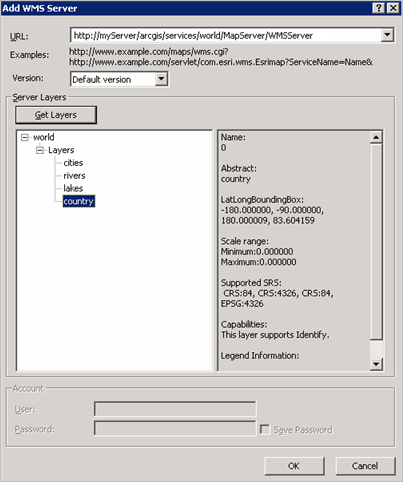
To verify that you successfully published your ArcMap document as a WMS service, you can consume the service in ArcCatalog right away.
Click Get Layers and wait for the WMS service to be connected. If successfully connected you should be able to see some of the metadata of the WMS service.

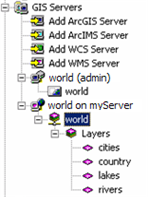
At this point you should see a node for your WMS service under the GIS Servers node in ArcCatalog. Expand the node representing your WMS service, select any one of the sub nodes, and click the Preview tab to see your service.

Although this tutorial connects to the WMS service in ArcCatalog, you'll find that the process for adding a WMS service in ArcMap is very similar. Clicking the Add Data button in ArcMap will allow you to browse to your list of GIS server connections. The WMS tutorial you created in this exercise should already be visible because you've connected to it in ArcCatalog already. However, you could add new connections the same way you did in this tutorial by clicking Add WMS Server.